Adding bat fins to a wrist brace
If you own a wrist brace, but feel like it’s missing a certain something:
Like the fins from Batman’s gloves!
here’s how you can add that to your wrist brace.
You’ll need:
- A sewing machine
- Black thread (polyester is fine)
- Fabric. You’ve got lots of options, but what you need is something either innately stiff, like vinyl, or thin but stiffened by thin cardboard or stiff interfacing. I used this polyester-backed vinyl.
- Either the 3D-printed template or the 2D-printed pattern to cut out of the fabric.
- A leather sewing machine needle, if indeed you use leather or vinyl fabric or you use cardboard as interfacing
- Tailor’s chalk
- A wrist brace you can sew the fins onto (I used the Walgreens one, which has a thin stretch-fabric section that covers the appropriate spot on the arm)
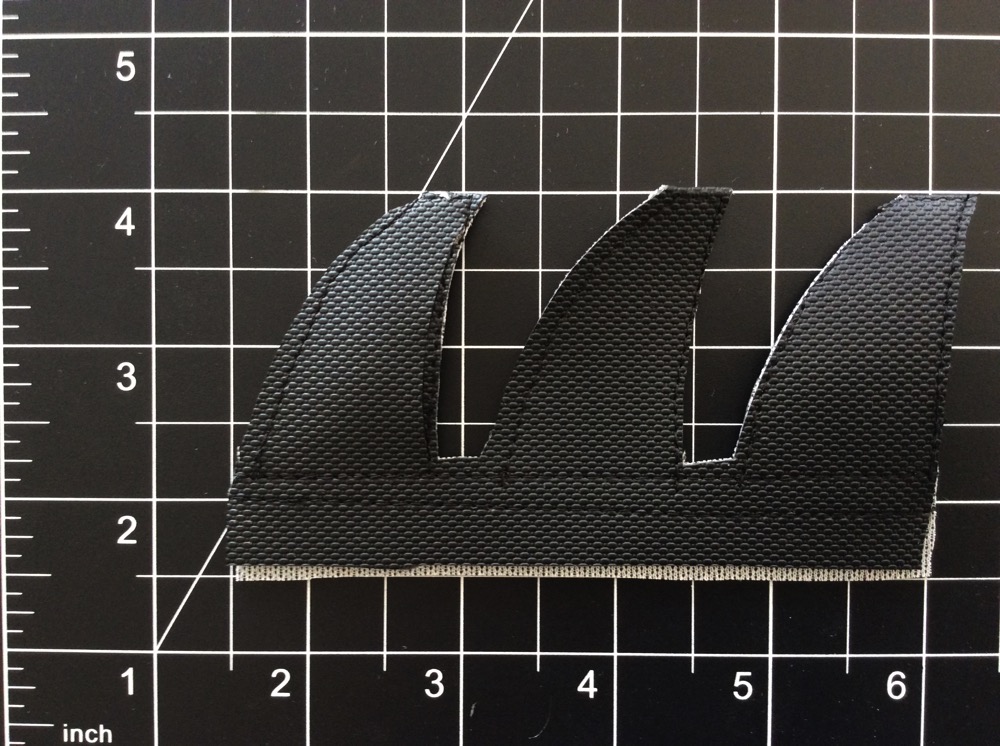
First, print out the pattern/template and cut the requisite shape out of the fabric.
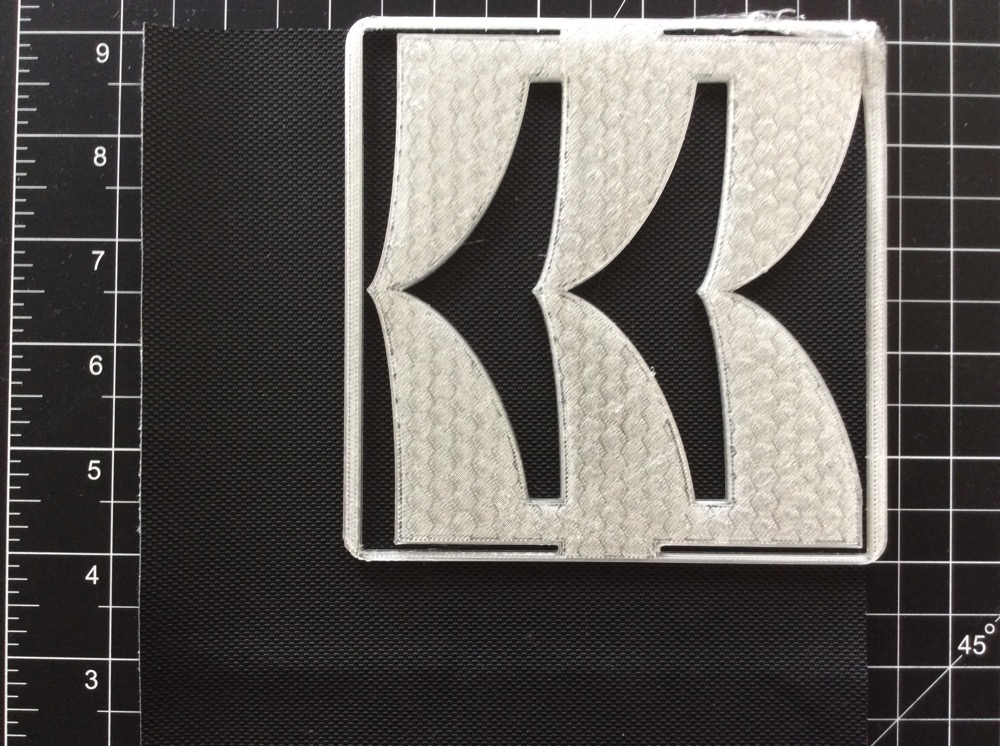
You’re going to cut the outer rectangle out of the fabric, then cut out four pieces of negative space: One at each end, and the two between pairs of fins.
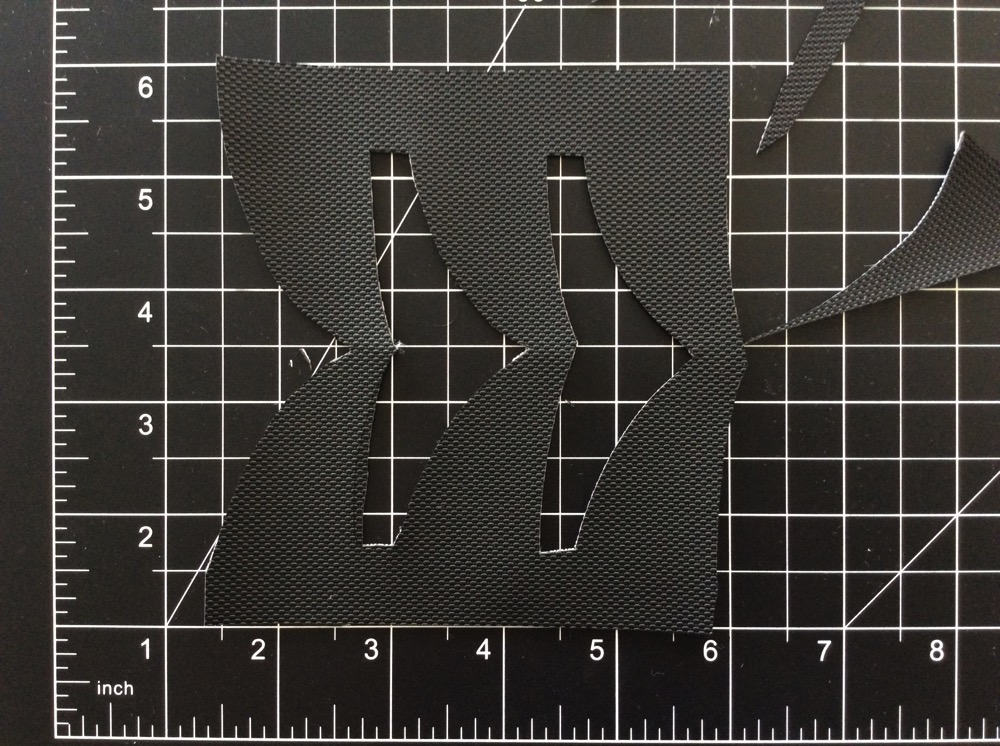
What you’ll be left with is a shape consisting of three pairs of fins, joined at their tips.
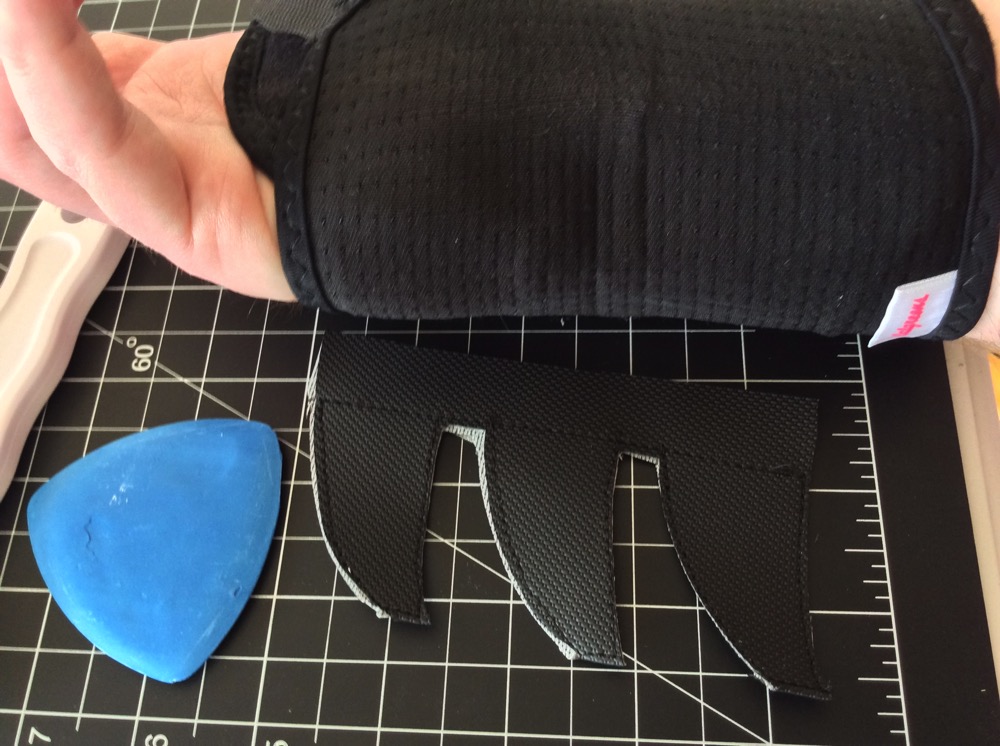
Fold that over and clip the fins together.
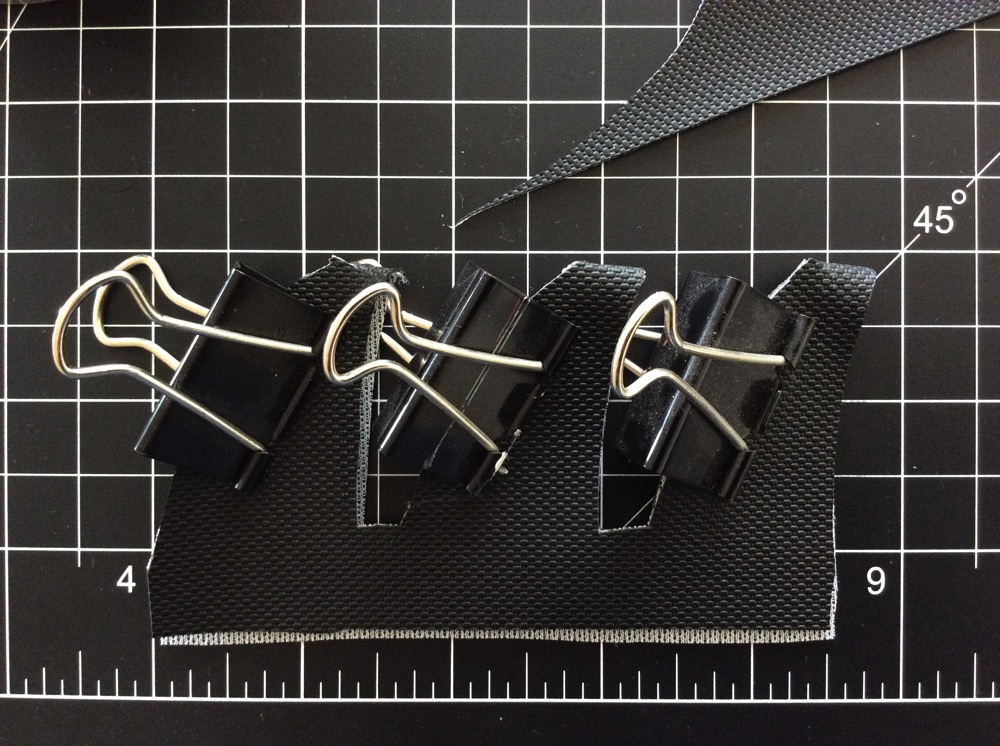
The 1-inch binder clips ended up being a tad big. I might’ve done better with paper clips or something.
Load up the appropriate needle and desired thread and sew the bottom together, just below where the fins join up with it. Add an extra seam just below that for stability, but don’t sew at the very bottom edge—we need to be able to spread the bottom apart later.
Take the clips off as you go (if necessary) or after that’s done, then sew along the perimeter of each fin. Look out for any edges that don’t quite line up, and make sure you sew within the more proximal edge. You’ll trim off the more distal edges afterward.
Trim off the misaligned edges (I used a 28mm rotary cutter). Redo any stitches you accidentally cut off.
Put the wrist brace on whoever’s going to wear it, and use your chalk to mark a single straight line on the brace’s fabric, parallel to the arm, on the ulnar side (the pinky-finger side).
It’s hard to see, but the mark is visible in the photo. (I might have been better off using my white chalk for this one.)
The last part will be tricky: Spread the bottom portion apart, and clip one side down to the fins on each end (the middle you will simply have to hold down by hand). Sew the other side onto the wrist brace, on the appropriate side of the line (the fins should be along the line). You should have about half an inch (1 and a quarter cm) to work with on each side, which should be enough.
Once you’ve done the first side, take the clips off (if you didn’t already do so as you went) and do the other side, holding it down by hand. Ideally, everything below the parallel seams you did earlier will be completely flat against the fabric.
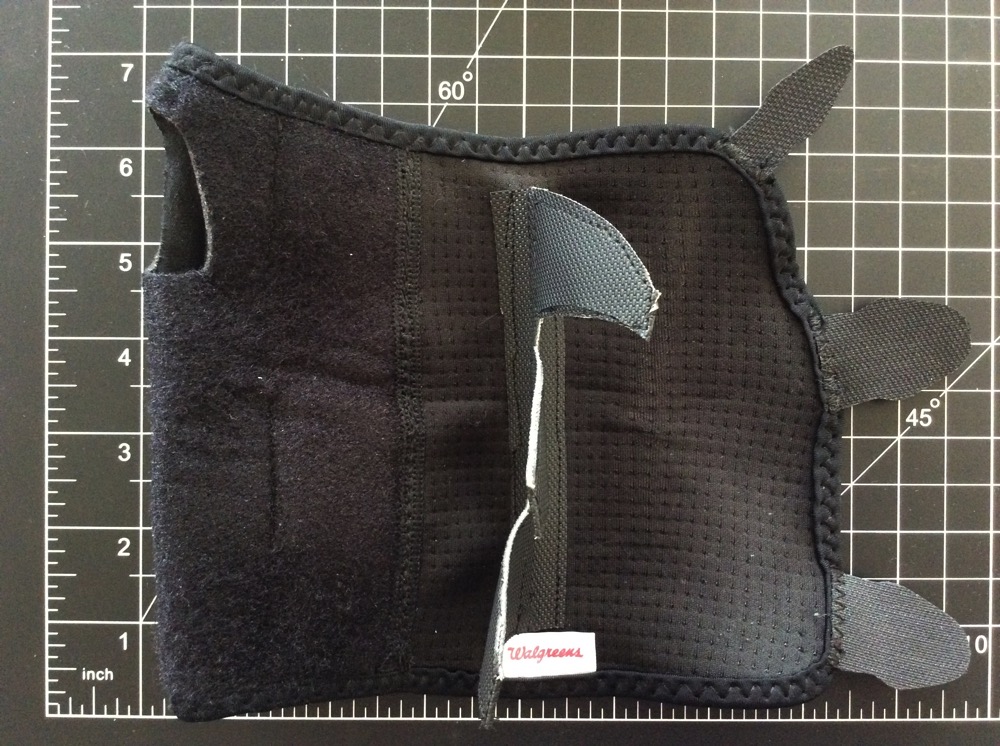
The left side in this image was the second side I did; I ended up making a couple of “happy little accidents” while trying to keep everything held down flat. But that’s fine; these seams don’t have to be perfectly straight.
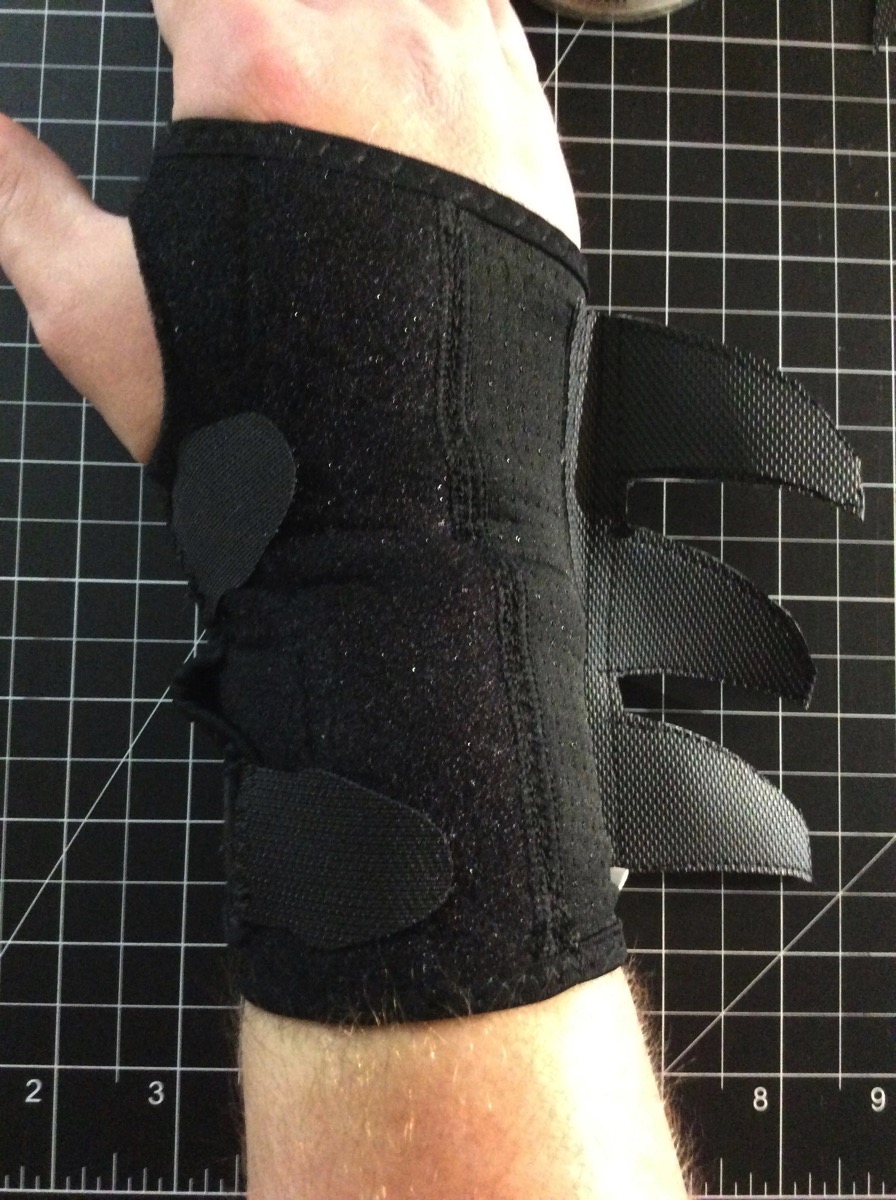
You’re all done!