I upgraded my iBook G4 to have an SSD
I did take some notes which I’ll present below, but this isn’t a full how-to. I used iFixIt’s guide plus occasional reference to the official Apple Service Source repair guide (those are not strictly public but can be had from your favorite abandonware site).
For this year’s #MARCHintosh, I decided to replace my iBook G4’s 30 GB spinning-rust hard drive with an SSD.

This was my second SSD upgrade, as I’d previously replaced my G4 Cube’s hard drive with an SSD. (The pictures on that page show a hard drive because, before the SSD upgrade, I’d replaced the Cube’s hard drive with another hard drive, and that was what I originally documented on that page. Then, after that, when I decided to upgrade to an SSD, I used my own tutorial. iFixIt didn’t exist yet.)
I rather despise working on laptops, though this wasn’t as bad as I’d worried it would be. (Upgrading the memory in my Mac mini was harder. I pointedly did that as soon as the machine arrived so that it would be done and I’d never need to open the machine back up for the rest of its life.)
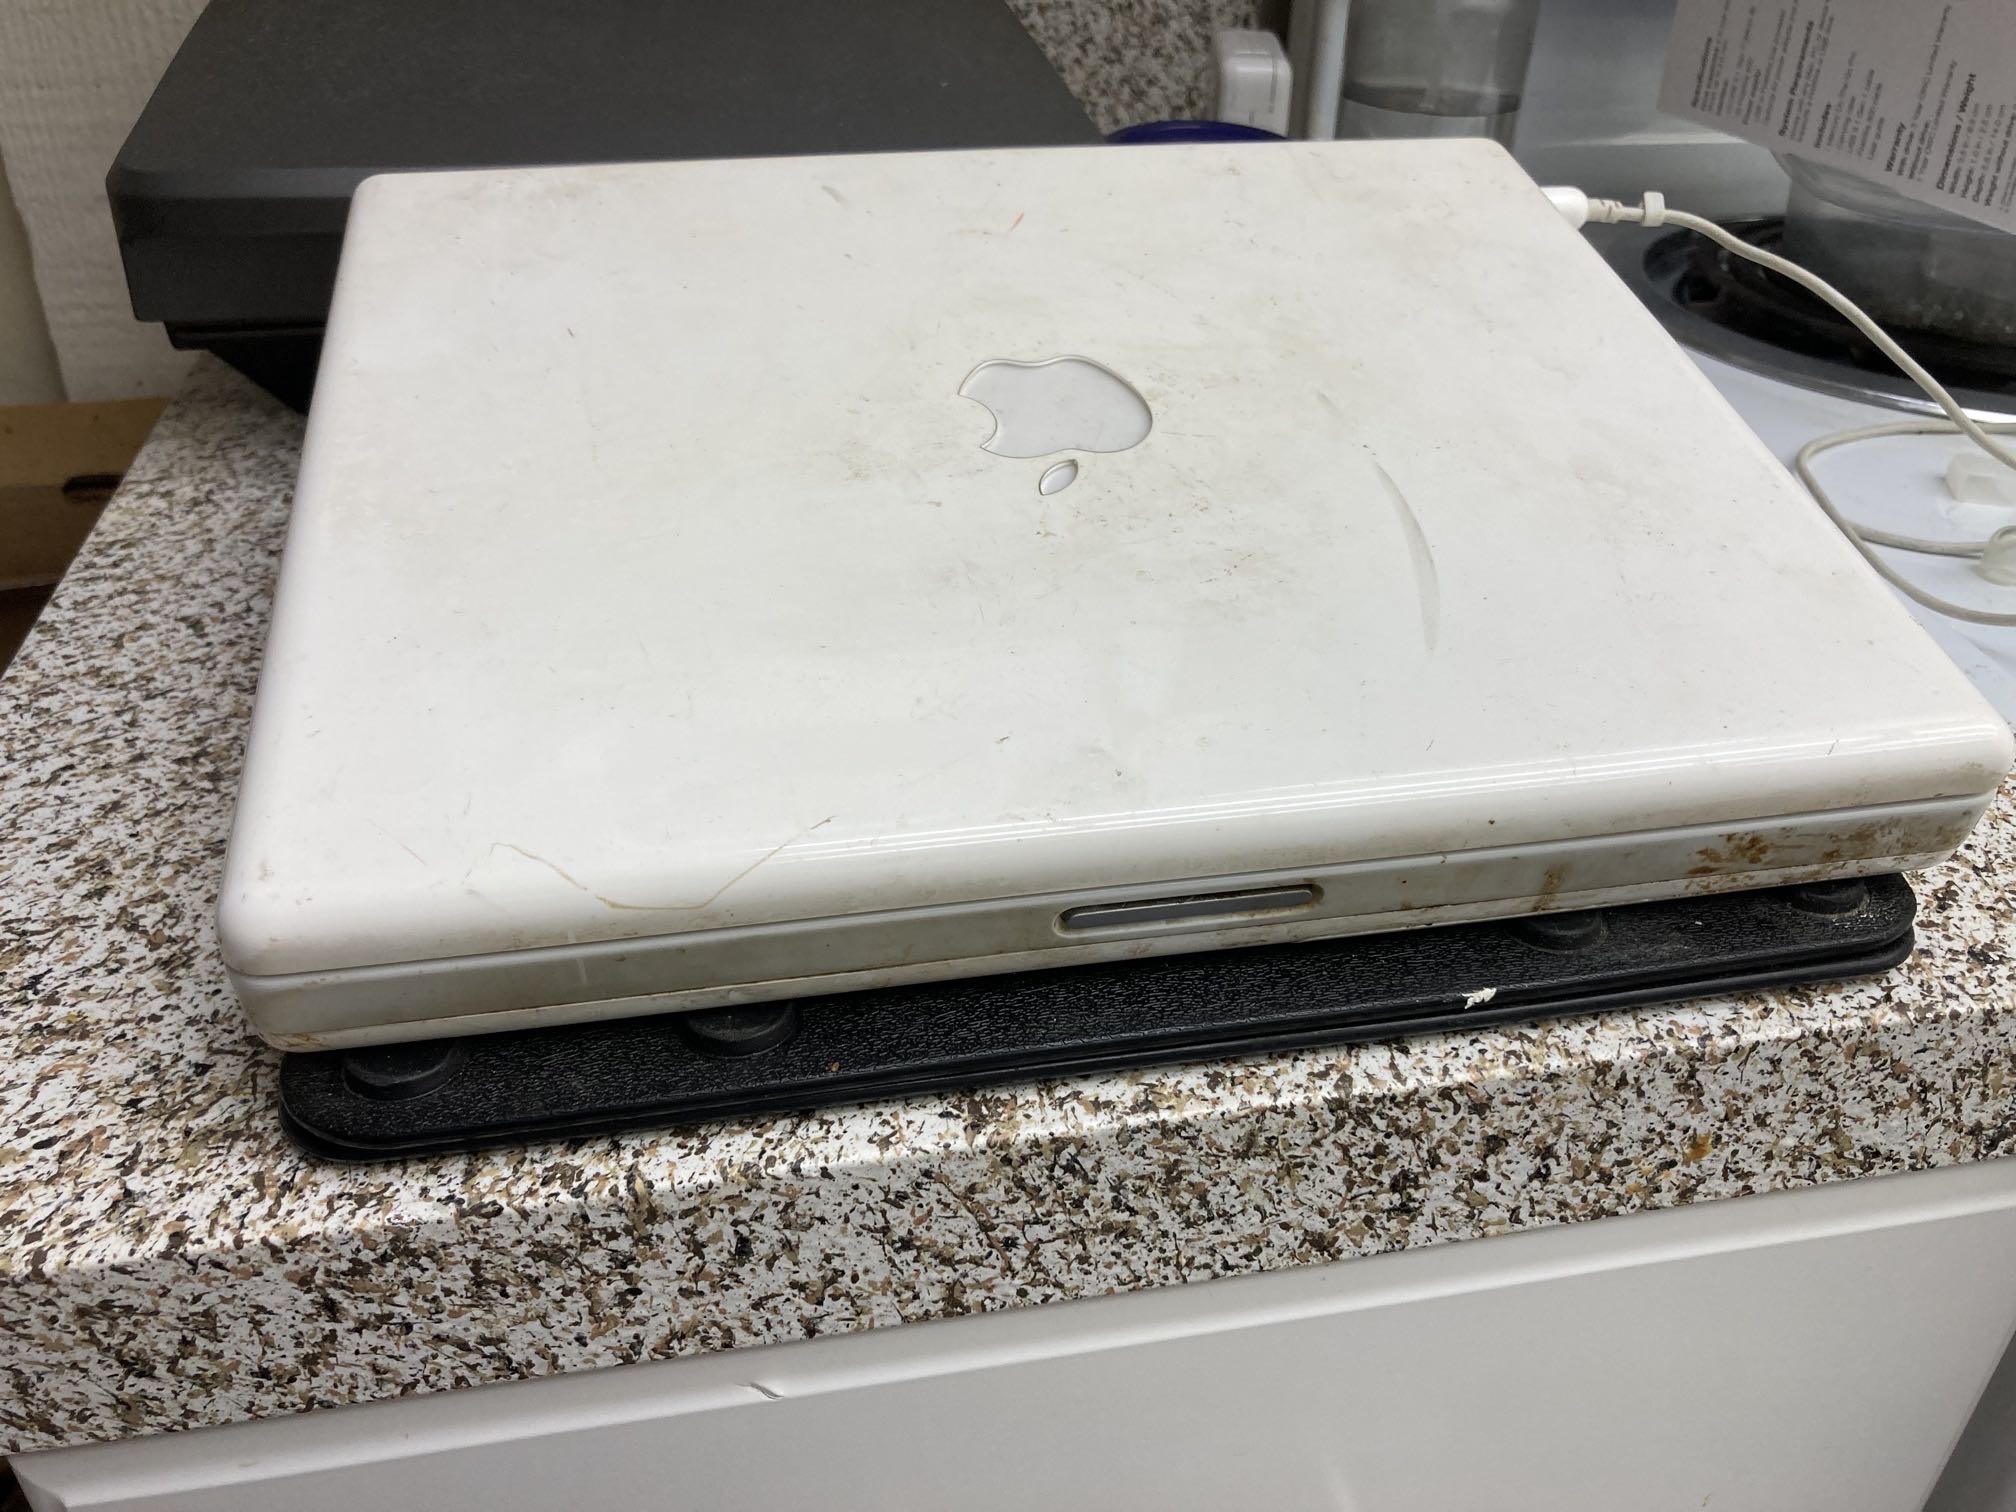
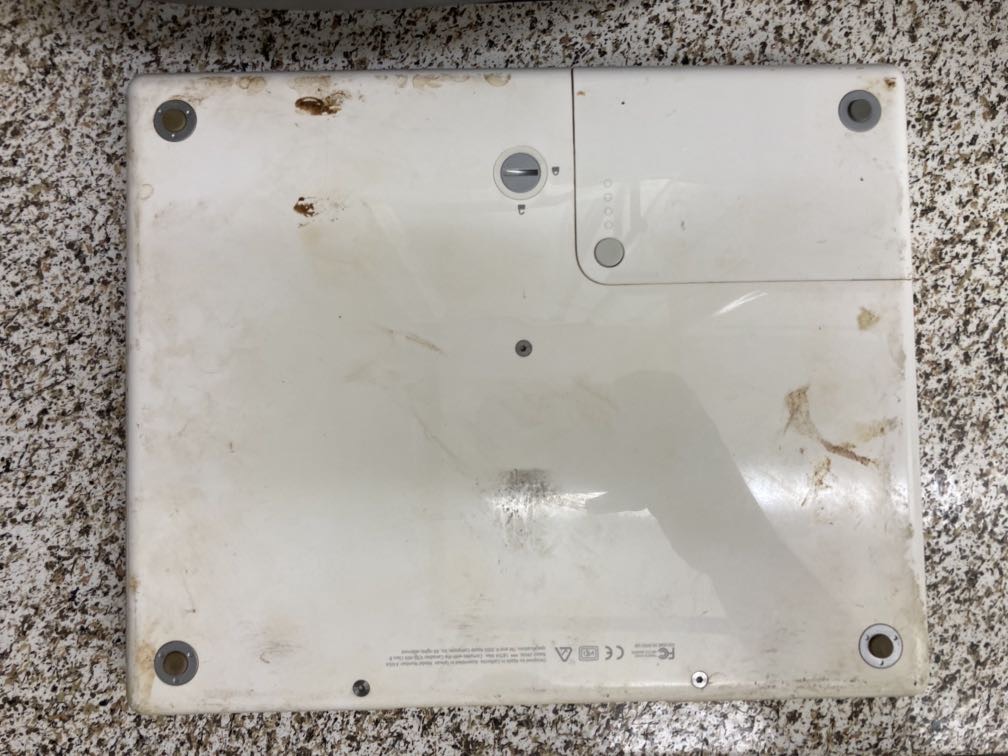
The thing that motivated me to go forward with it was that the iBook was absolutely filthy. It had been Mom’s, and she was a smoker in her life; she would routinely be smoking a cigarette and working on the computer, and getting so absorbed in the latter that ash would fall from her cigarette onto and into the computer. So I resolved to clean the disassembled parts as well as upgrade the storage.
For the cleaning, I mostly used paper towels wetted with diluted all-purpose cleaner. A couple small spots of deposited nail polish were resolved with cotton pads soaked with nail polish remover. It worked fine, at least so far—if I’ve started some chemical process of plastic deterioration, I don’t know it yet.
Before cleaning.

After cleaning.
Once I decided the project was go, I also added in a memory upgrade, because it was less than $20 and I was already buying stuff from OWC for the operation anyway. The machine had 512 MB of RAM; now it has 1 GB. (Plus the 128 MB on the logic board.)
One key difference from the Cube upgrade: The iBook, being a laptop, doesn’t have as much space for the upgraded drive. The Cube had some wiggle room taken up by brackets; the iBook has basically none. In the Cube, I installed a standard-size SATA SSD plus a SATA-to-PATA adapter; in the iBook, that wouldn’t have fit.
So my first thought was an M.2 SSD, that being the form factor that today’s computers generally use. I ran into a problem: There are like three different signaling protocols that all run over the M.2 form factor, and M.2 correspondingly has three different keying combinations to guard against protocol mismatches (an incompatible SSD won’t physically fit, though an SSD that fits isn’t necessarily compatible). I noped out of trying to sort that out.
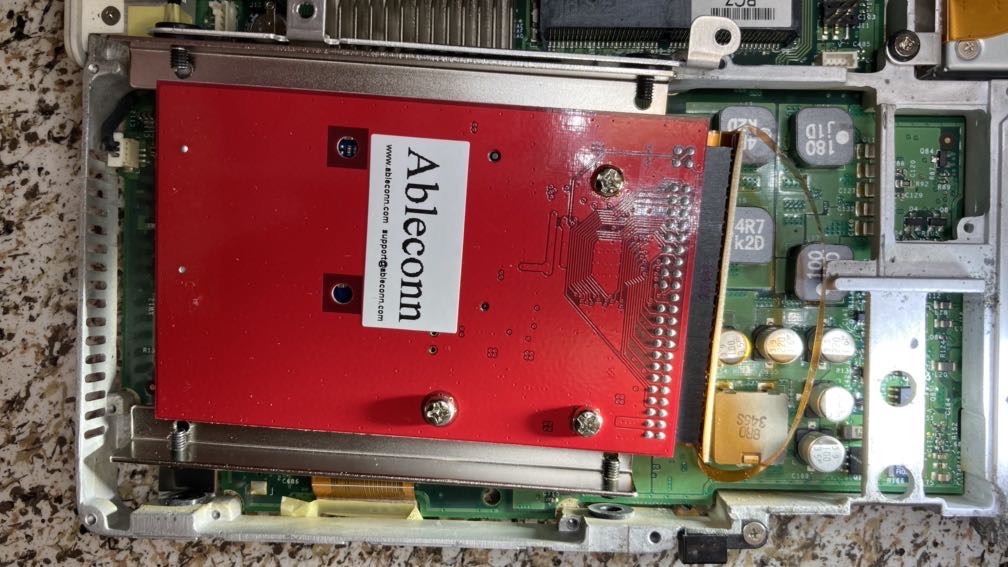
What I went with instead was mSATA. This form factor is kind of dying off as M.2 takes over, but Kingston still sells mSATA SSDs directly from their own website, and I found a suitable adapter on Amazon. (I buy from alternatives like Micro Center or direct from manufacturers whenever possible, but it wasn’t in this case. The manufacturer’s website links to their Amazon store.)
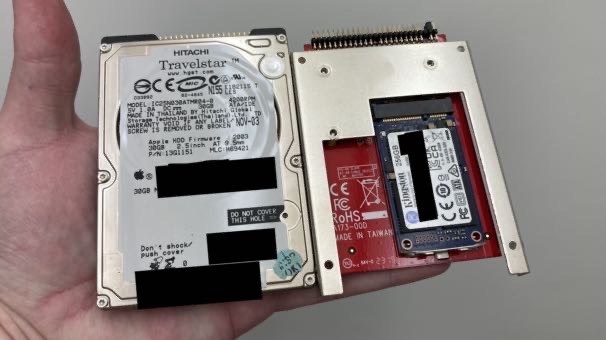
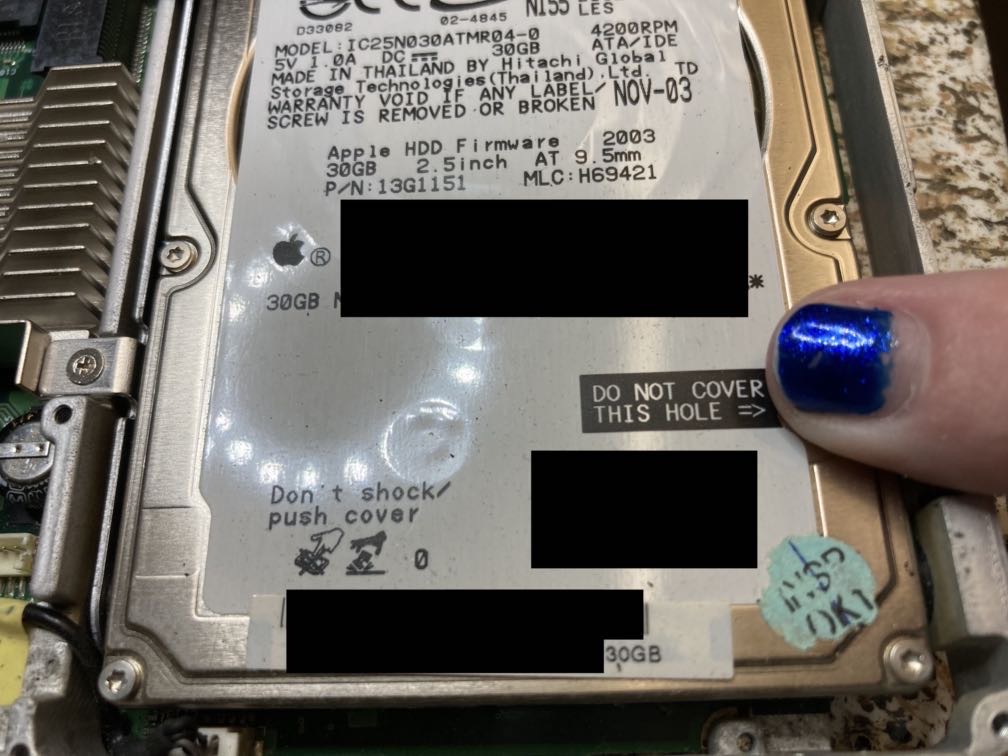
The old spinning-rust drive is 30 GB; the new SSD is 256 GB.
What’d I put in there?
Here’s the bill of materials I ended up with:
- Kingston 256GB mSATA SSD (you could go bigger, but I cheaped out)
- Ableconn mSATA to IDE adapter
- OWC 1 GB PC2700 RAM SO-DIMM (the original Apple DIMM was PC2100, so this was a speed upgrade as well as a size upgrade)
- OWC external FireWire SSD to reinstall the OS from, since this machine can’t boot from USB and I don’t trust the internal optical drive to not eat the next disc I put in it
… and as I write this up now, I notice that OWC has now discontinued that last product. Did I buy the last one or something?
(It feels like OWC is moving away from selling products for older Macs, having now discontinued their last FireWire product AFAIK, and I’m bummed. At a time when the retro Mac community is resurgent, we can use every source for quality gear for our old Macs that we can get.)
For tools, I mostly used one of iFixIt’s toolkits, plus the screw extractor set they sell. I also found a lighted magnifier extremely helpful.
I also used iPartition to set up the external SSD with the Tiger and Leopard boot DVDs and various other things (including a copy I’d already made of the HDD).
Hiccups
Hiccup #1: The case of the borked screw
One of the three M2 (i.e., 2mm, i.e., really tiny) screws on the right side of the keyboard tray was visibly rusted and seemingly damaged. Trying to unscrew it (including a couple of attempts with the wrong size driver) damaged it further.
This was after I’d already worked over that third screw a bunch. It was even more rust-covered at first.
I looked at a bunch of options and asked for ideas on Mastodon. A couple of people recommended precision screw extractors (much smaller and a different type than the kind you drill into a screw). I bought the set that iFixIt sells, which it turns out is OEM’d by Moody Tools.
The second extractor bit I tried, one of the smaller ones, worked perfectly, and drove the screw out as easily as the normal drivers did the undamaged screws. Thus I was unblocked and able to continue toward the hard drive.
I did encounter a second rusted screw near the latch mechanism. This I was able to clean with a few things, including a nylon-brush bit on a Dremel, without damaging the head. That screw came out and went back in with no further fuss.
Hiccup #2: The case of the stuck installer
After I got everything back together, the Tiger DVD wouldn’t boot. After either the verbose spew or the spinner, the OS switches to the normal GUI with a blue background, and should then show the Installer on that background—but it would get stuck at the blue background, with no window and no cursor.
On a whim, I tried Leopard (not a supported OS on this machine), and was pleasantly surprised to find that the iBook booted that DVD happily. Moreover, that it worked.
Leopard’s installer refused to install, of course, but it let me cancel and access the rest of the utilities—including Terminal, from which I was able to run system_profiler. Here, I figured, I could at least see whether any of my new hardware was showing up.
And the answer was no. Well, that was a let-down! The RAM slot read as empty (it definitely wasn’t), and querying the PATA bus hung.
I decided to try switching back to the original Apple DIMM, since it’s easier to get to the RAM than the hard drive. When I put the original DIMM back in, I noticed that it sat farther into the slot than the upgrade DIMM had been.
“HMMMMMM.”
So I popped it back out and re-upgraded the RAM. Sure enough, with a bit more attention to this detail, the new DIMM went into the slot exactly as far as the Apple DIMM had.
And when I booted the machine up again… everything worked. The new RAM showed up. PATA no longer hung.
“Hmm. PATA doesn’t hang anymore. Was that where Tiger was hanging?”
Yup! Or similar enough, anyway. It fixed the problem; Tiger’s installer was now unblocked.
Hiccup #3: The case of the 512 MB partition map
One of my goals for this machine is to try to cajole it into booting Mac OS 9 even though that isn’t supported, so I wanted to make sure to install the disk drivers that Mac OS 9 needs onto the SSD. This is an option in Disk Utility of that era… except it wasn’t showing up, presumably because this is a machine that (officially) can’t boot Mac OS 9 anyway, so why would it need that?
(The original hard drive had Mac OS 9 drivers installed. Maybe Panther was more permissive about that.)
Now, there is a second way to get Mac OS 9 drivers installed: hdiutil create has an option, -layout 'UNIVERSAL HD', that sets up the image with a partition map containing a full set of Mac OS 9 drivers for every then-imaginable device interface, from SCSI to ATA to FireWire. (There is also 'UNIVERSAL CD', which gives a different set of drivers.)
So my plan was:
- Create a RAM disk using
hdiutil create -nomount ram://262144(that creates a 128 MB RAM disk), since I had nothing writable that I wasn’t about to obliterate (besides thumb drives), and I had plenty of RAM. - On the RAM disk, create a sparse disk image with the “UNIVERSAL HD” format and sized to the number of blocks
diskutil inforeported for the SSD. - Attach that disk image with
-nomountso I can munge its contents directly. - Use
pdiskto edit its partition map, specifically to create all the partitions I wanted. - Use
newfs_hfsto format each of the partitions as HFS+J (or plain HFS+ in the case of the OS 9 partition).
Problem: Whenever I attached the sparse disk image, pdisk showed that the partition map was set for a 512 MB storage device, not a 256 GB storage device. It doesn’t offer any way to change that, even in the advanced options.
Solution: This was apparently a Tiger bug, because when I rebooted back into the Leopard DVD, the same series of steps worked perfectly.
So I had to do my partitioning and formatting in Leopard, then reboot back to the Tiger DVD to install the OS.
Results
Well, the first sign of success was that the Tiger installation—from the FireWire SSD to the IDE SSD—only took 15 minutes. If you’ve ever installed old Mac OS X from a CD or DVD to a spinning-rust drive, you’ll remember it definitely takes longer than that.
My informal test of the HDD’s speed before the operation showed about 30 MB/sec write speed (dd if=/dev/zero bs=10485760 of=test, followed by math to convert its output to MB/sec because Tiger’s dd doesn’t have status=progress). After the upgrade, I found out about Xbench, and ran that, and it showed about 90 MB/sec write speed in most cases, which is basically saturating the UDMA100 interface. So, with the caveat that the methodologies of the two tests aren’t the same, I feel comfortable saying I tripled my throughput.
Tiger certainly feels way faster than ever before on this machine. The progress-bar portion of the boot process is now a tiny fraction of it, as the progress bar goes from 0 to 100% in about a second.
I’m very happy with the upgrade. I plan to see if I can convince the machine to boot from a Mac OS 9 partition (not a supported configuration—the machine came with a special version of Panther) or install Leopard (also not supported; this machine officially only supports Panther and Tiger plus Classic).
More photos
How dirty this thing was
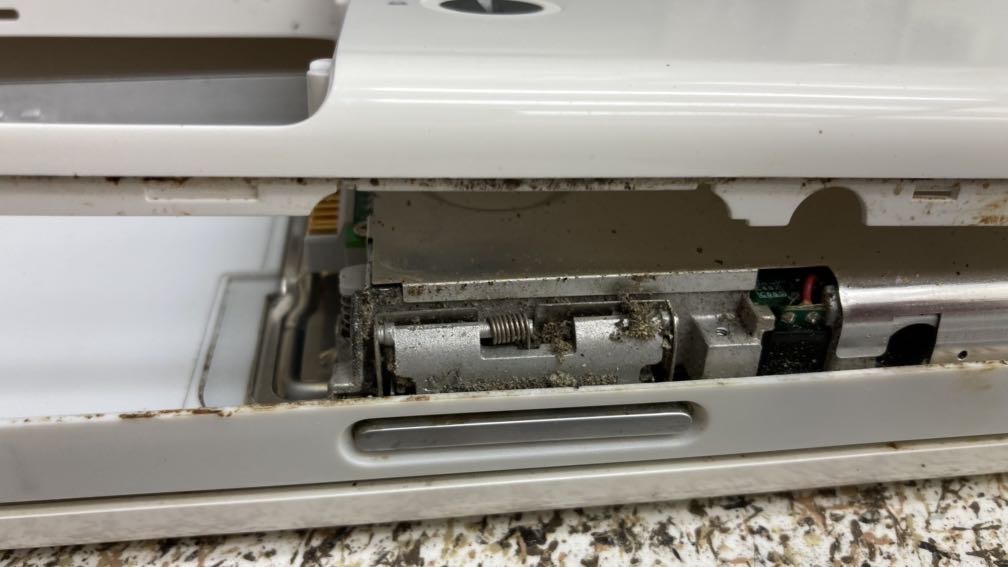
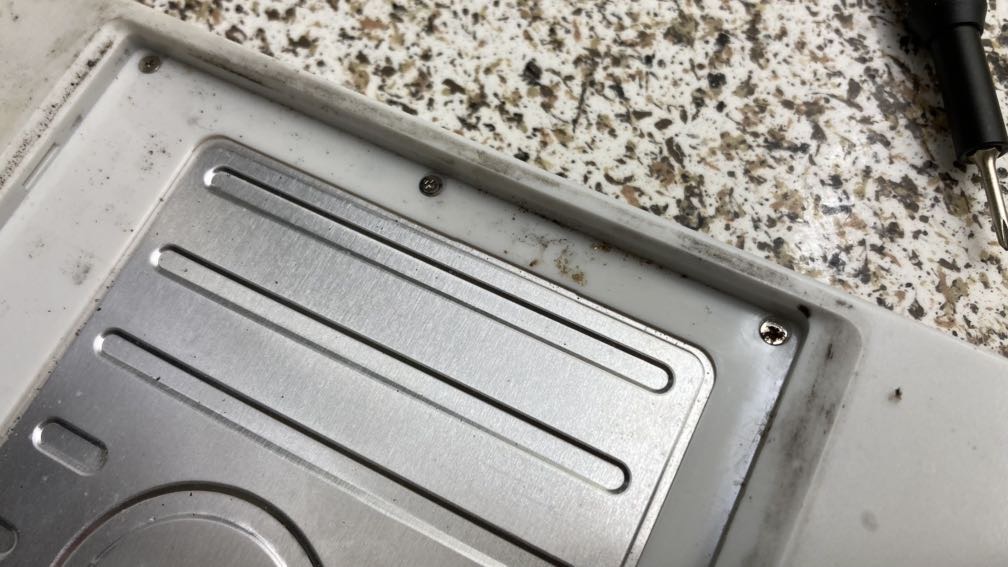
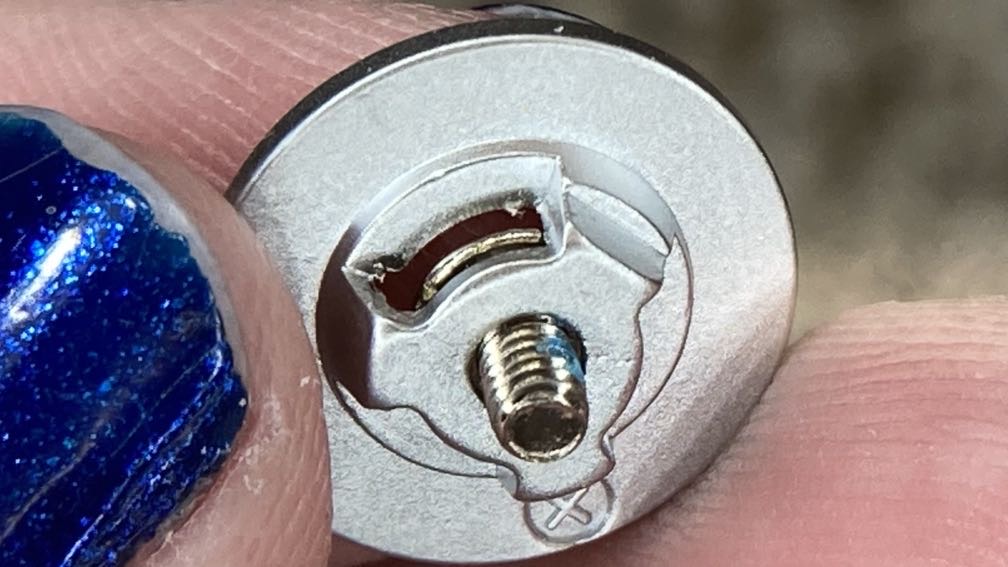
Note #1: Drive bay shock bumpers
Note the rubber bumpers inside the drive bay, inside the front of the machine. The heads of the screws on that side of the drive bracket (or the IDE adapter replacing it) rest inside these bumpers. There’s also a bracket with matching bumpers on the other side, which should be transferred from the old drive to the new one.
Note #2: Reinstalling the feet
The iBook’s feet have a design that ensures there’s only one way to reinstall them. You’ll need to pay attention to it when putting the feet back in, to ensure you don’t put them in crooked.
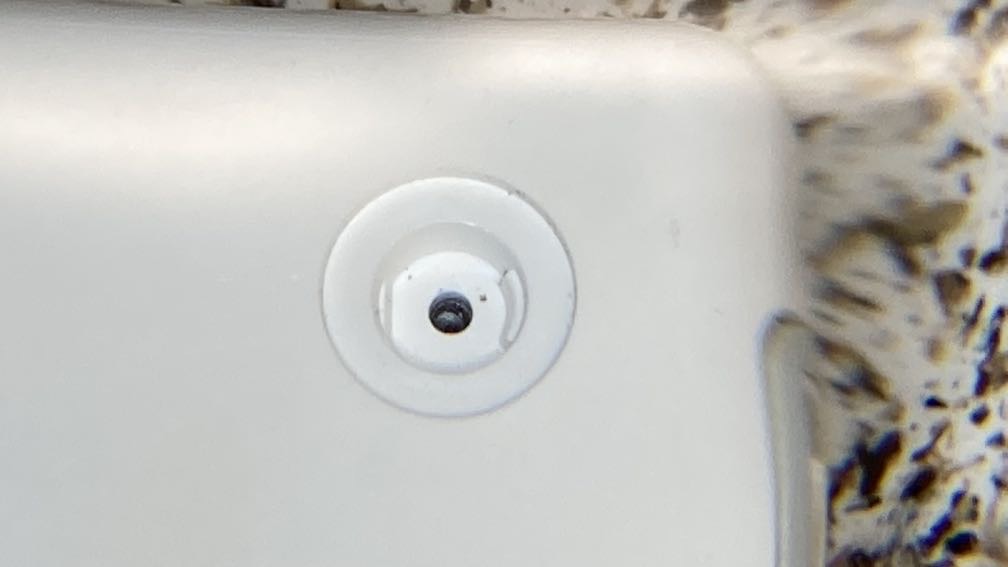
The lip in this foot ring mates to the ridge in the recess. If the foot ring isn’t properly aligned, it won’t sit in the recess evenly. Don’t force it! Pull it out, look for the keying, and turn it so it’s correctly positioned.
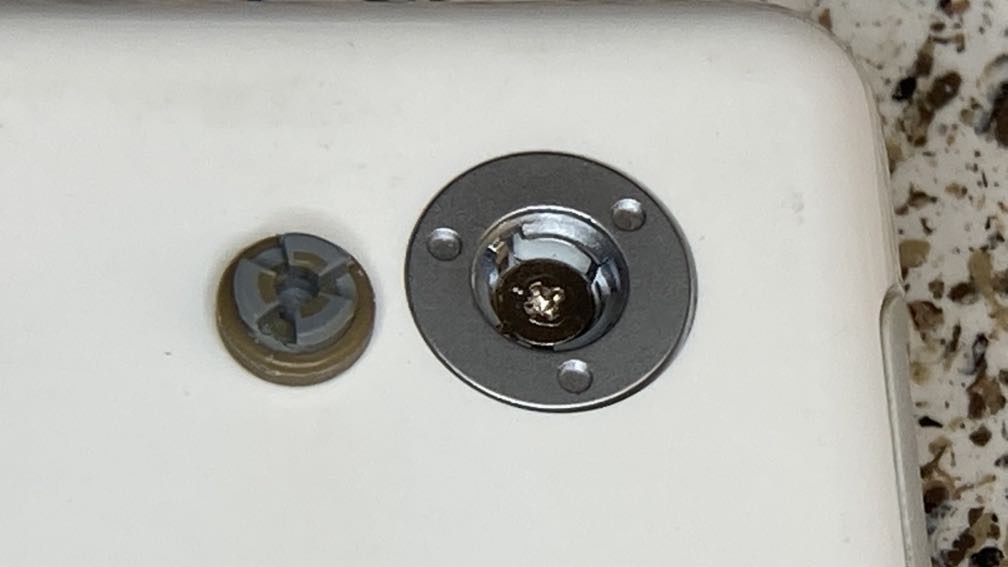
More keying. As before, pay attention and make sure you’re lined up, and back off and try again rather than trying to force it in.
Just for fun
March 31st, 2024 at 16:06:47
Thanks for the info on the Ablecomm adaptor. I chased it down on the local Amazon.au and was also offered “NFHK mSATA Mini PCI-E SATA SSD to 2.5 inch IDE 44pin Notebook Laptop Hard Disk case Enclosure “. I suspected it was a case-nly but the site shows it as two pieces, the case plus the board. Dd I mention it’s only AU$20.99?
Thanks again, Peter M.
March 31st, 2024 at 17:48:58
Just found it. One difference with that one is that it doesn’t have the clip-in mechanism that the Ableconn adapter does; I guess you’re meant to use those screws through the corner holes of the SSD board to fix it in place.
This one looks similar to mine: https://www.amazon.com.au/Renkforce-Interface-Converter-Female-44-pin/dp/B01ATC3J7O But that one’s quite a bit more expensive than the NFHK one.
March 31st, 2024 at 22:30:32
Cracking read, I love old hardware restoration posts. The iBook G4 was my first laptop, I bought it third-hand from a friend in 2008. This was a nostalgic trip!
I’m a little confused at how/why the Leopard installer refused to install though. I installed Leopard in my G4 no problem and the iBook G4 is listed as a supported machine on the wikipedia for Leopard:
* https://en.wikipedia.org/wiki/Mac_OS_X_Leopard
April 1st, 2024 at 00:21:40
I had wondered that myself, particularly since the DVD boots. The Wikipedia article you linked filled in what I was missing: Leopard requires an 867 MHz G4, and mine is 800 MHz.
That does give me a shot of confidence that if I can convince the installer to let me install, then Leopard will actually work fine!
April 1st, 2024 at 03:25:01
This is not an easy task, well done. For those of you that don’t know the iBook G4’s logic board and hard drive are essential hermetically sealed in the plastic chase AND a second layer of metal. I ruined my first iBook G4. when attempting this same upgrade as the ribbon cables that connect the power button and LEDs ripped in half from age and how brittle they were. I bought another used iBook G4. It still has the stock 60 GB hard disk and now the slot-loading “Super Drive” is dead so I will have to fix it eventually If I want to keep using it. I actually bought a used PowerPC G4 MacBook Pro to use and these are WAY easier to work on, just a few screws and you have access to everything.
I will note to anyone reading this the €79 Amiga-like Morph OS is really good experience on these 32-bit single core PowerPC Macs, very snappy. I also installed Debian 12 Trixie using the Sid branch on my iBook G4 and using guides (and links to files to get WiFi working) on the Mac Rumours forum I got it working perfectly. Using the Window Maker Window Manager it’s snappy and you get NeXTStep?OPENSTEP experience.
April 1st, 2024 at 07:35:02
Sorry to hear about the severed ribbon cable! This is exactly why I hate working on laptops. There were a couple of points in my own disassembly where the tutorial warned “now be careful or you might rip the socket off the board” and I pretty much just got lucky.
Re your Debian iBook: I hope you’ve avoided getting affected by that sshd/liblzma backdoor! IIRC, sid is the branch of Debian where the backdoor was discovered, so you might want to check and make sure you’re not affected.