Apple Bug Friday! 69
Friday, August 31st, 2007This bug is Member variable is not an Objective-C term. It was filed on 2007-08-10 at 12:13 PDT.
This bug is Member variable is not an Objective-C term. It was filed on 2007-08-10 at 12:13 PDT.
This bug is Either you can use a sdef directly, or you cannot. It was filed on 2007-08-10 at 11:51 PDT.
If you attended WWDC, you can head over to ADC on iTunes and see what you missed.
This bug is File type of GIF files in UTI list is incorrect. It was filed on 2007-07-01 at 18:18 PDT.
This bug is kIconServicesUpdateIfNeededFlag not documented. It was filed on 2007-05-25 at 02:02 PDT.
This bug is kIconServicesNoBadgeFlag not documented. It was filed on 2007-05-25 at 02:00 PDT.
Code signing is new in Leopard, right?
Right?
No, actually; it’s much older, as I found out while responding to a question on programming.reddit. In my results for a Google search that I did, I stumbled over a link to TN1176, which mentions the addition of code signing.
TN1176 is the release notes for Mac OS 9.
The technote doesn’t actually say much. In fact, I can go ahead and quote it in full:
Apple Code Signing is a new technology in Mac OS 9
that allows applications, plug-ins, and content to be
signed by developers. Apple Code Signing Certificates
assure your customers of your identity and the integrity
of your products. For more information, please see the
Mac OS Security and Cryptography Web
site.
That site’s gone now, of course. Fortunately, the Wayback Machine saved a copy.
![]()
Apple Verifier
![]()
Apple Signer
The top link on that page is to the Security 2.0 SDK, which includes a lot of stuff relating to code signing. There’s a pair of utilities called Apple Signer and Apple Verifier, some API documentation, some sample code, some resource templates (remember those?), a library, and the debugging root certificate.
UPDATE 06:29: Apple Verifier actually comes with the OS, but Apple Signer is only available in the SDK.
If you’ve ever seen a 'sign' resource while hacking in ResEdit, now you know what it was.
Meet the new boss
Same as the old boss
Oh, and in case you’re wondering what the Signer and Verifier applications look like:
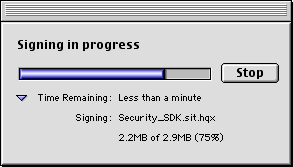
Signer at work.
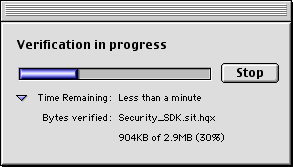
Signer can also verify.
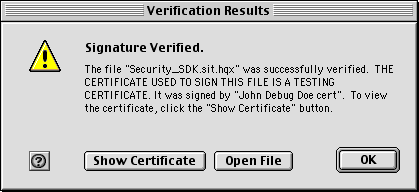
Result of verification.
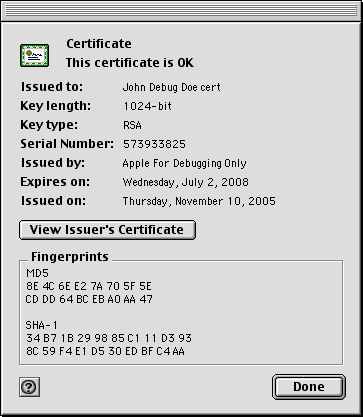
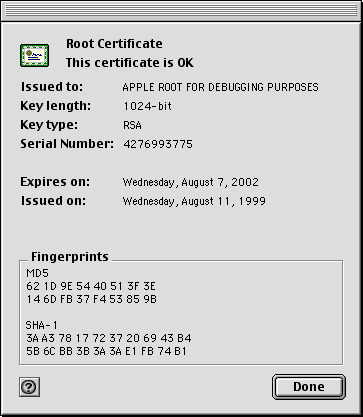
These are the certificates from the verification. The root cert is the “Issuer’s Certificate” for the other one.
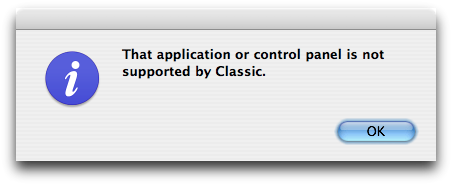
This is why I didn’t explain the difference between Apple Signer’s Verify command and Apple Verifier: I don’t know, because this message comes up when I try to launch Apple Verifier. And no, I don’t know why the message comes up.
Plot is a freeware plotting and graphing application for Mac OS X. It’s good, but its documentation and UI are not very effective at explaining its most basic usage. I eventually figured out how to use it, but while it could have been much worse, it certainly wasn’t obvious. So I’m going to give you the 60-second primer that I needed.
If you’re not familiar with the basic concept of a graph: It’s zero or more data points with x and y values, lain out in a graphical depiction mapping the x and y values to positions on the graph. Plot is an application that turns your data into a graph.
Plot is organized around buffers. Each buffer is a set of data: zero or more points with x and y values, and x and y error-values.
Buffers are listed and managed in the Data Inspector window, wherein Plot indicates the current buffer with a ➽ character. You edit the contents of the current buffer in the Data View window, and you edit its parameters (most of which concern the graphic display of the data) in the Inspector window (not to be confused with the Data Inspector window).
A new document doesn’t contain any buffers. You create buffers using the New Empty Buffer command in the File menu, or by importing data from various sources, including text files and MySQL databases. It even has a feature to automatically update the buffer from the database periodically, but I haven’t tried it.
You can have as many buffers as you want, and you can change the order in the Data Inspector window, using the ▲ and ▼ buttons.
The Data View is fairly straightforward, but there is one gotcha: Double-clicking the X or Y column header switches the column between number values and date values. I have no idea why this isn’t in a more obvious place instead; I actually threw away a document, thinking that it had become corrupted somehow, before I figured out later that double-clicking the column header is what tells the application to switch it.
Another pitfall: There’s no “your document is unsaved” warning. You may want to unplug your keyboard so you don’t hit ⌘W or ⌘Q by accident. ☺
The text file format is good if you want to store data independently of the Plot document (especially since Plot uses NSKeyedArchiver for its native file format). The text format is very simple: the first column is the x value, and the other column is the y value. Each record is one line. Each file is one buffer. You can import multiple buffers at a time, but you can only export one at a time.
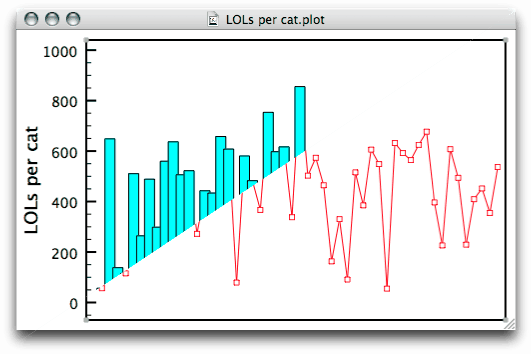
To change the width of a bar in the bar graph, change the “symbolsize” in the Data Style pane of the Inspector. This is also used for the symbol rendering; unfortunately, there’s no way to have both a symbol and a bar graph and have them be different sizes (or colors).
To assign text along the sides of the graph indicating what the axes represent, use the Axis Text field in the Axis pane of the Inspector.
To have a legend (most useful for multiple buffers), first assign each buffer a comment in the Data Inspector, then turn on Plot Legend in the Legend pane of the Inspector. To place the legend, either use the two fields there, or use the “move legend” tool in the Inspector (which you can also activate by pressing the L key in the graph window). The move legend tool allows you to set the position of the legend by dragging within the graph window.
Here’s the Plot document for the example graph used herein (compressed with bzip2).
Ordinarily, I’d post this on del.icio.us, but this isn’t on developer.apple.com and I don’t think del.icio.us allows file: URLs.
Most use of Core Audio goes through Audio Units, but the Audio Unit API has historically been undocumented. Today, I finally found the Audio Unit documentation. Turns out that, rather than being in the /Developer/ADC\ Reference\ Library/Documentation folder (where you would expect documentation to be), it’s hidden in the /Developer/Examples folder. This documentation is so good (damn near production-quality) that I feel like I’ve struck a rich vein of gold ore.
WTF, Apple?
Added 2007-09-29: This is the hard way. The easy way is my free app Make RAM Disk. It does the same process shown here, but with a lot less effort from you.
I just posted to this lisppaste with a punt solution. Since this solution really has nothing to do directly with the problem stated, I thought I’d share it with you as well, with HTMLization and some editing from the original.
hdiutil attach -nomount ram://num_sectors (sector = 512 bytes = 0.5 K)
This outputs a device path (/dev/foo) on stdout.
newfs_hfs -v volume_name device_path
Formats the RAM disk as HFS+. See the manpage for other options.
[Added 2007-09-23] If you want a case-sensitive file-system (HFS+ being case-insensitive by default), add the -s flag before the device_path.
[Added 2007-10-14] If you’d rather not use HFS+, then you can use newfs_msdos to get FAT12, FAT16, or FAT32 (you choose which with the -F option), or newfs to get UFS.
diskutil mount device_path
The RAM disk will be mounted at /Volumes/volume_name.
You could also do something involving mount(8) instead of diskutil if you wanted to mount it inside NSTemporaryDirectory(). Remember to unmount it (hdiutil detach device_path, or the Eject command in the Finder or Dock) when you’re done.
UPDATE 2007-08-07: Changed from hdid to hdiutil attach, since hdid is deprecated and hdiutil works just as well.
UPDATE 2007-09-29: Added link to Make RAM Disk.
UPDATE 2007-10-14: Added references to other commands in the newfs family (specifically, newfs_msdos and newfs).
I’ve recently been beating my head against PostScript’s gradient (“shading”) system. Plenty of documentation and examples are available for when you’re working in the DeviceGray color space, but when you’re in DeviceRGB, it gets hard. Part of this is due to the fact that the PostScript Language Reference Manual’s description of shadings and the functions that power them is overly abstract and decorated with too much math for my language-oriented mind.
So, here I’ll try and explain it more clearly, particularly by explaining functions in the context of shadings, rather than separately.
A shading in PostScript is represented by a dictionary. Valid keys in the shading dictionary are:
Functions aren’t as you expect them to be. Rather than a callable object (a procedure), a function is a dictionary. (This, BTW, is the architectural reason for Quartz’s CGFunction class, although CGFunction actually uses a C function callback — what would be a procedure in PostScript.) There are three types of function dictionaries; I’ll only deal with type 0, a sampled function (a “sample” is a step in the gradient). A sampled function contains, or fetches from a file, the samples it will return, in a “data source”.
[0 1]).DeviceGray, Range should be two numbers; in DeviceRGB, it should be six.You might expect that the samples should be given as an array. You would be wrong. Instead, PostScript wants pure binary data, either from a file or encoded as a string. So, for example, in RGB, every three characters (bytes) are one sample. I use a hexadecimal literal, or when I want to use an array, this procedure (which you may consider to be under the modified BSD license):
% array -> hexstr -> string
% Converts an array of integers to a string. [ 65 66 67 13 10 ] -> (ABC\r\n).
/hexstr {
4 dict begin
/elements exch def
/len elements length def
/str len string def/i 0 def
{
i len ge { exit } ifstr i
%The element of the array, as a hexadecimal string. If it exceeds 16#FF, this will fail with a rangecheck.
elements i get cvi
put/i i 1 add def
} loopstr
end
} def
And yes, I know that that procedure has nothing to do with hexadecimal. I was probably tired when I wrote it.
Note: If you use hexstr to create a shading dynamically from an array of samples, be aware that when you divide the length of the array by 1 (gray) or 3 (RGB) or 4 (CMYK) to get the proper value for Size, you must use cvi on the quotient, because div returns a real and makepattern demands an int.