Archive for the 'Creations' Category

New tool: sednames

Friday, June 20th, 2008

What if you could use sed to rename files?

Well, now you can.

sednames is a utility that lets you specify a program for sed on the command-line, which it then uses to rename the files that you also specify on the command-line.

The twist is that, unlike other batch-renamers, sednames also supports your VCS. For the most common cases (svn, hg, bzr, and git), there’s a –vcs option:

% sednames -e 's/Replace/Mix/' --vcs=hg *

This command-line will use Mercurial (hg mv) to rename every file by replacing “Replace” with “Mix”. Of course, if a name doesn’t contain “Replace”, then that name will be unchanged and sednames is smart enough to not try to rename that file.

Not only that, but just in case you’re using some oddball VCS (or you want to copy instead of rename, or something), sednames supports using any program to rename your files, as long as it accepts both the before and after names in its arguments. The –help output is more specific, but to put it simply, it works similarly to find‘s -exec option.

You can download the current revision directly, or use the Mercurial repository to follow or contribute to its development.

New tool: Localization Helper

Monday, June 16th, 2008

One thing that I noticed a few days ago while working on Growl 1.1.4 is that some strings aren’t translated in a couple of the localizations. I reported this on our localization mailing list, but it got me thinking: I could really use a program that would scan a tree of source code and tell me of problems like this.

So I wrote one.

Localization Helper is a command-line tool to walk a tree of source code looking for .strings files, and compare different localizations of them. It reports duplicate (not-translated) strings, and will soon (maybe by the time you read this) report strings that are missing altogether.

Currently, it only compares all other languages to one primary language, which defaults to English. I didn’t feel like making it compare every language to every other language. ☺

The program scans every directory you specify on the command-line. If you don’t give it any arguments, it scans the current working directory. Also, it has some options, which you can see with the –help option.

Here are some excerpts of its output for the Growl 1.1.3 source code:

*** Found problems in Core/Resources/*.lproj/Localizable.strings
Duplicate strings in Localizable.strings between English.lproj and cs.lproj:
"User went idle" = "User went idle";
"You are now considered idle by Growl" = "You are now considered idle by Growl";
"No activity for more than %d seconds." = "No activity for more than %d seconds.";
"Growl was unable to create the socket for Network notifications." = "Growl was unable to create the socket for Network notifications.";
"You are no longer considered idle by Growl" = "You are no longer considered idle by Growl";
⋮
!!! Warning: Localized file Extras/GrowlSafari/de.lproj/InfoPlist.strings is missing
!!! Warning: Localized file Extras/GrowlSafari/ja.lproj/InfoPlist.strings is missing

*** Could not read plist file at path Extras/GrowlSafari/de.lproj/Localizable.strings
*** Could not read plist file at path Extras/GrowlSafari/ja.lproj/Localizable.strings
*** Could not read plist file at path Extras/GrowlSafari/pt_BR.lproj/Localizable.strings
*** Could not read plist file at path Extras/GrowlSafari/sv.lproj/Localizable.strings

You’ll need to have either Leopard or Python 2.5 + PyObjC (Leopard comes with both) to use the program. (BTW: PyObjC rocks.)

Until I release it sometime later this week (hopefully), I provide two ways to get the program:

  1. You can download it directly.
  2. You can clone my repository:
    hg clone http://boredzo.org/localization-helper/hg/

Of course, if you clone your repository, then you can easily get updates by running hg pull.

Also, there’s a commits feed, in case you want to stay on top of localization_helper’s development using your feed reader.

New app: Apple Extended Keyboard II Overlay Generator

Tuesday, May 6th, 2008

Last week, John Gruber and Dan Benjamin released episode 20 of their podcast, The Talk Show. It was devoted to the Apple Extended Keyboard (the Saratoga) and Apple Extended Keyboard II (the Nimitz). This renewed my interest in bringing my own Nimitz back into service using a Griffin iMate.

The Nimitz is the greatest keyboard ever made for the Macintosh. It has the best keys, the best height adjustment, the best Caps Lock key (it physically locks down!)—everything.

One of its distinctive features is a couple of pegs near the top of the keyboard—one near the Escape key, and another near the Power key.

The Saratoga had, printed under the F1 through F4 keys, the words “undo”, “cut”, “copy”, and “paste”. Because these definitions were useless (not to say confusing) to most Mac users, the Nimitz moved these labels to a plastic overlay that came with the keyboard. Those who actually needed it could put it on, which they did by hanging it on those two pegs, and everyone else could simply leave it in the box.

This is a photo by Flickr user penmachine (Derek K. Miller) of an Apple Extended Keyboard II with Apple's overlay, cropped to show the corner of the overlay hanging around the Power key.

That overlay is even more useless today. But I think the idea of an overlay defining the function keys is a good one, especially as Mac OS X has made the function keys actually useful.

So I decided to make a new overlay.

This one does not have the seldom-useful F1–F4 labels. What is <em>does</em> have is labels under F9–F12, listing their default Mac OS X actions (the three kinds of Exposé, plus Eject).” src=”http://boredzo.org/aek2-overlay/AEK2-MacOSXOverlay-3-Cropped.jpg” /></a></p>
<p>My original plan was to distribute the EPS file for this overlay, and provide instructions on how to customize it.</p>
<p>After writing that it’s easy to edit the file, followed by an entire page of instructions on how to do that properly, I decided it would be better to write an application to do it for you. I call this application the <a href=Apple Extended Keyboard II Overlay Generator.

I’ve included with the application two ready-made overlays: a replica of the classic Apple overlay; and my Mac OS X overlay. You also have the option of editing them or creating your own from scratch.

Assembly instructions (among other information) and the download are on the webpage.

UTI Property List Helper 1.0

Friday, March 21st, 2008

For a forthcoming blog post, I was recently writing a test app that displays images. This had me once again slogging through the list of System-Declared Uniform Type Identifiers and assembling type declarations for the image types by hand.

I’m tired of doing that. So I wrote a new application called UTI Property List Helper.

The main window consists of a table view, in which you enter UTIs, and two text views displaying chunks of Info.plist XML data.

This application automatically updates the CFBundleDocumentTypes and UTImportedTypeDeclarations arrays in its window with information on the types you enter, obtained from Launch Services’ database of all types registered by any app on your system.

No more searching for that OSType, or leaving it out because it’s too much work—this app does all the grunt work for you. Enjoy.

Multi-stroke key bindings, Extended vi Edition

Thursday, February 21st, 2008

As some of you know, I use the multi-stroke key bindings by Jacob Rus to easily type strings such as ⌃⇧⌘⌫. I mostly use these characters in three places:

  1. Correspondence with users
  2. Posts here
  3. Documentation

And it sure beats looking those characters up in UnicodeChecker or the Character Palette.

But I was never satisfied with the original set of key bindings that that file provides. The first problem that I had was that the arrow keys are emacs keys, not vi keys:

Solid Left (back) ⌃M + ⌃B
Solid Right (forward) ⌃M + ⌃F
Solid Up (previous) ⌃M + ⌃P
Solid Down (next) ⌃M + ⌃N
Dotted Left (back) ⌃M + B
Dotted Right (forward) ⌃M + F
Dotted Up (previous) ⌃M + P
Dotted Down (next) ⌃M + N

I’m a vi guy, so I wanted the hjkl arrangement for my arrows. So that was the first change I made.

I also added a bunch of characters, and reassigned some of them:

Additions:
Ch Description Key sequence
Return ^M + Return
Command ^M + C
Command (Apple) ^M + ^A
Option ^M + ^O
Control ^M + ^C
Shift ^M + ^S
Caps Lock ^M + ^S
Smiling face ^M + ^F
Frowning face ^M + F
× Multiplication sign ^M + ^X
Modifications:
Ch Description Key sequence Reason for modification
The arrows (solid and dotted), as noted above Because I prefer vi to emacs
Return ^M + ^R To free up ^E for Escape
Enter ^M + R To free up E for Eject
Home ^M + Shift-^H To free up ^H for ←
End ^M + Shift-^E To free up H for ⇠
Escape ^M + ^E To free up ^X for × (multiplication sign)
Eject ^M + E To keep Eject on the same key as Escape

In case you’re wondering about the division sign (÷): The OS already provides this as ⌥/, and always has been (all the way back to 1984). I didn’t need to add it.

Also, in case you’re wondering about “Apple” above: The Apple logo is ⇧⌥K, so I didn’t need to add that, either. (Plus, I never use it.)

File: DefaultKeyBinding.dict.bz2

This file contains all of the above bindings, as well as the ones from Jacob Rus’ original that I didn’t change.

To install it, put it in the KeyBindings folder in the Library folder in your Home folder. You may need to create the folder. The bindings are loaded on application launch by Cocoa, so you will need to relaunch any already-running applications in order to use the bindings in them.

List process start dates

Friday, February 8th, 2008

I just wrote a test app that prints the name and start-date of every process that the Process Manager will tell it about. Here it is:

File: ListProcessStartDates-r4.tbz

It’s a command-line tool, so you’ll need to run it from a terminal. Alternatively, you could wrap the executable in a service using ThisService, then use the service to insert the listing into a text document.

The code to convert the start-date of each process is ugly: Process Manager provides those dates as numbers of ticks since system startup, and I currently go through NSDate to convert those to numbers of seconds since 1970-01-01. I’m fairly sure that this answer is imprecise.

I’d prefer to get the startup time as a number of ticks since some epoch (probably 1904-01-01), so that I can do a more precise conversion. If you know of a way, please post a comment.

Cascading indent filter/service

Thursday, February 7th, 2008

When I respond to a user via email, I sometimes need to refer to a file or folder in the user’s file-system. Since users don’t ordinarily see path separators, I use a cascading-indent syntax:

    Home
        Library
            Application Support
                Adium
                    Users
                        Default

This works well, but typing all those tabs would be a good way to get RSI in my left hand. So, today, I finally wrote a Perl script to do it for me.

File: cascading-indent.pl.bz2

Of course, I use this script as a service, thanks to ThisService.

One downside to using it as a service is that you can’t directly use it in Mail. Mail inserts the contents of the general pasteboard (i.e., it pastes) rather than using the service-communication pasteboard. So I’ll need to trampoline through TextEdit for this to work. (This is on my list of bugs to file.)

UPDATE 2008-03-14: Apple fixed this bug in Mac OS X 10.5.2. So now you can invoke it directly from Mail—no trampolining needed.

UPDATE 2008-05-24: Never mind. It’s still broken. ☹

The iPhone flashlight

Thursday, December 13th, 2007

If you should have an urgent need for a flashlight, but have only an iPhone or an iPod touch with you, fear not. Now you have an iPhone flashlight.

New Leopard Dock separator

Monday, October 29th, 2007

If you’re like me, you reject Leopard’s new 3D-looking Dock out of hand, preferring the new 2D smoke look also introduced in Leopard. All it takes is a simple defaults command to switch the Dock from 3D to 2D mode.

I think the new 2D Dock looks a lot cooler than the Dock in Tiger, except for one part that, for me, sticks out like a sore thumb.

It’s the separator between the applications and not-applications sections.

Here’s what Tiger’s separator looks like:

It's just a black line completely bisecting the Dock's background.

Simple; gets the job done.

Leopard, on the other hand, has a goofy-looking zebra crossing instead:

A zebra crossing, in case you don't know, is a series of white (or in this case, light gray) lines. It's named for the alternating black and white stripes of the zebra, which the zebra crossing vaguely resembles.

I can’t have that. So I fired up Lineform and created a new separator that I think looks a lot better:

My separator is a glowing white line.

Obviously, it’s modeled after the white LEDs that have replaced the black arrowheads to mean “application is running”.

In case you prefer this separator as much as I do, here’s how to install it:

  1. Download this image. I’ll assume you downloaded it to ~/Downloads.
  2. If you keep your Dock on the left or right edge of the screen, open the image in Preview and rotate it.
    • If your Dock is on the right edge, rotate the image left (⌘L).
    • If your Dock is on the left edge, rotate the image right (⌘R).
  3. Rename the image file. If your Dock is on the bottom, name it separatorstraight.png; otherwise, name it separatorstraight-horizontal.png.
  4. Open a second Finder window.
  5. Hit ⇧⌘G and go to /System/Library/CoreServices/Dock.app/Contents/Resources.
  6. Make a backup of the separatorstraight.png or separatorstraight-horizontal.png file from that folder.
  7. Move (⌘-drag) the image file from ~/Downloads to the Resources folder.
  8. Authenticate, if necessary.
  9. Open a terminal window and killall Dock. The Dock will relaunch automatically.

I haven’t made a 3D version. If you want one, post a comment. It shouldn’t be too hard to make, thanks to vector graphics.

Negative Turing Test fixes are done

Tuesday, October 16th, 2007

I’ve finished fixing number 12. Now, when you forget to answer the Turing test, your response will reappear in the comment form when the post loads.

For those of you who run Negative Turing Test on your own blag: WordPress has a bug as of both 2.1 and 2.3. Normally, when you submit a comment, WordPress sets three cookies that it uses to automatically fill in the Name, Email, and URL fields on the commenter’s future visits. When a plug-in like NTT deletes the comment, WordPress fails to notice and empties out the cookies. The result is that, when NTT deletes the comment, the name, email, and URL fields come back empty. (This is true with or without the fix for number 12.)

There’s nothing NTT can do about that—it’s a WordPress bug that I discovered in testing the fix for number 12. I isolated the problem and have already fixed it here, and I’ll soon submit a patch to the WordPress developers so that you can all have this fix as well. Until they accept it, here’s the patch for WordPress 2.3.

Growl Registration Dictionary Editor

Monday, October 1st, 2007

Since 0.7, Growl has been able to detect a registration dictionary in your application when your app launches—all you have to do is put it in a file with a certain name inside your app bundle. We call this feature auto-discovery or auto-registration.

I don’t think people have been taking much advantage of this feature, though, for two reasons:

  1. We didn’t mention it in the docs. (This would be the major reason.)
  2. There was no handy-dandy editor to quickly bash out a registration dictionary file.

Sure, we can all use Property List Editor, but that’s not a tool honed to the purpose. You have to rifle through GrowlDefines.h to find all the different keys you can use in the dictionary (the docs only cover the most basic set).

Well, now there’s a tool honed to the purpose.

Here’s beta 1 of the Growl Registration Dictionary Editor. I invite you to try it. Obvious things worth doing:

  • Creating new reg dicts
  • Editing existing ones
  • Importing a reg dict from your saved tickets (great for porting your existing app to use auto-reg!)

Feedback will be appreciated. If you’re subscribed to the Growl discussion list, you can send it there; if not, comments here are OK.

The source for the GRDE is in the Growl source repository.

If this announcement looks familiar to you, don’t worry; you’re not going crazy. I posted a similar message to the Growl discussion list, then decided to edit it a bit and post it here, since I know that at least several of you are Growl framework users who can put this app to good use.

New utility: Make RAM Disk

Saturday, September 29th, 2007

Make RAM Disk is a simple app to create and mount a RAM disk on Mac OS X 10.4 or later. It encapsulates my previously-stated series of terminal commands into a tiny little app—just launch it and go.

I use my RAM disk for three things:

  • Download holding area. I have Mail, Safari, OmniWeb, and Adium all set to download files to the RAM disk. If I decide I don’t want to keep the download, I just leave it there until shutdown (only works on my desktop Mac).
  • iShowU storage. I create a 1-GiB RAM Disk named “iShowU temp” which iShowU is set to use as its scratch disk. Using a RAM disk for this helps your recording frame rate.
  • Xcode build folder. On my laptop, I symlink the project’s build folder over to the RAM disk (e.g., mkdir /Volumes/RAM\ Disk/Adium-build && ln -s /Volumes/RAM\ Disk/Adium-build build). This cuts out a lot of the disk grinding that happens during a build, which I believe helps my battery life.

Enjoy!

An easy application to turn off applications’ Dock tiles

Tuesday, July 24th, 2007

I just released an application called Configure Application Dock Tile. The purpose of this app is to make it easy to turn an app’s Dock tile off or on.

I first had the idea when making some screencasts (including the Adium screencasts). Normally, iShowU shows up in the Dock, and I don’t like having that artifact in the screencast; I find it distracting. So I wrote this app to make it easy for me to turn off the Dock tile in future versions of iShowU.

(If you downloaded this earlier today, please do re-download it, as I overhauled the user interface. That’s why this post disappeared in the meantime.)

Adium GSoC podcast!

Tuesday, July 10th, 2007

This hasn’t gotten anywhere near the traction that I think it deserves, so I’m announcing it here too: We’ve done a podcast!

While we were supposed to be attending WWDC, Colin, David, and I played hooky and went down to the Googleplex to record an episode of the Google Summer of Code podcast. The podcast is hosted by Leslie Hawthorn, who runs the GSoC program. Adium participated last year and is participating again this year.

The episode, which is available from the GSoC blog post, is very funny and gives a bit of insight into how we run our open-source project.

It’s a little over 20 minutes of advice and programmer hilarity. Check it out. ☺

Blog spam count: 2007-06

Sunday, July 1st, 2007

Spam comments blocked by Negative Turing Test in June 2007:

38,502

Bug in the accessors generator

Tuesday, June 5th, 2007
 unsigned short multiplierBase, multiplierPower;

The output from the accessors generator:

- (unsigned) short;
- (void) setShort:(unsigned)newShort;

- (unsigned) multiplierBase;
- (void) setMultiplierBase:(unsigned)newMultiplierBase;

- (unsigned) multiplierPower;
- (void) setMultiplierPower:(unsigned)newMultiplierPower;

This is both an advisory to you and a reminder to me. I’ll be tackling this after WWDC.

Blog spam count #2

Friday, June 1st, 2007

I’ve reset the NTT counter at 26,445 spams. Once again, next month will bring another count of spams-per-month.

I think I’ll do this every month and establish a trend. Maybe find some free graphing software and plot a graph with the counts.

Now that’s what I call a speed-up

Tuesday, May 29th, 2007

CPU Usage 0.4 creates and throws away an NSImage every time a view (one per processor) updates. This is incredibly wasteful: The application uses about 0.7% of a CPU on my system.

But I decided that I can make that faster. Profiling (thanks, Shark!) revealed that the hot spot was creating, measuring, drawing, and throwing away the attributed string that goes into the NSImage. That’s not hard to optimize away: as the old doctor joke goes, “stop doing that”.

So I created a couple of branches, and went in two different directions:

  • Direction A uses NSLayoutManager—specifically, one NSTextStorage, one NSLayoutManager, and one NSTextContainer for every (CPU, percentage) pair. A view can display any of 101 percentages (0–100%), so on my four-core system, this branch creates 404 storages, 404 managers, and 404 containers.
  • Direction B uses an NSImage, just like 0.4 does, but keeps it around.

Both branches are written to create the (NSImage|NSTS, NSLM, and NSTC) lazily, but for testing, I added this code to force the creation of all the cached objects up front so that my time-trials would represent normal usage (that is, usage after all the objects have been created and cached):

- (void)drawRect:(NSRect)rect {
    //BEGIN TEMP
    if(!(percentageImages[0U])) {
        static BOOL isInDrawRect;
        if(!isInDrawRect) {
            isInDrawRect = YES;

            NSLog(@"Preloading percentage images for CPU %u", CPUNumber);
            NSRect tempImageBounds = [self bounds];
            NSImage *tempImage = [[NSImage alloc] initWithSize:tempImageBounds.size];
            [tempImage lockFocus];
            for(float usage = 0.0f, maxUsage = 1.01f; usage < maxUsage; usage += 0.01f) {
                [self setCPUUsage:usage];
                [self drawRect:tempImageBounds];
            }
            [tempImage unlockFocus];
            [tempImage release];
            NSLog(@"Done preloading percentage images for CPU %u", CPUNumber);

            isInDrawRect = NO;
        }
    }
    //END TEMP

    ⋮
    (The rest of -drawRect: is here)
}

That’s from the NSImage branch, but the code in the NSLayoutManager branch is basically the same. (Note: tempImage is not the cached image; it’s just a throwaway destination for the drawing done by -drawRect: in the inner call.)

Once I had finished this, and fully optimized both branches using Shark, the next step was to try them out and see how they fare.

I launched all three versions of CPU Usage, and then did the following:

# Watch the CPU usage of the CPU Usage processes for five minutes (300 seconds)
top -l 300 | fgrep 'CPU Usage' > top-CPU_Usage.txt      %/Volumes/RAM Disk(130)
___
# Fourth column (as determined by whitespace) is CPU usage
fgrep 221 < top-CPU_Usage.txt  | awk '{ print $4; }' > top-CPU_Usage-0.4.txt
___
fgrep 1121 < top-CPU_Usage.txt | awk '{ print $4; }' > top-CPU_Usage-NSLM.txt
___
fgrep 1118 < top-CPU_Usage.txt | awk '{ print $4; }' > top-CPU_Usage-NSImage.txt
___
# The results, in percent of one CPU
~/Python/avg.py < top-CPU_Usage-0.4.txt                   %/Volumes/RAM Disk(0)
0.671
___
~/Python/avg.py < top-CPU_Usage-NSLM.txt                  %/Volumes/RAM Disk(0)
0.667
___
~/Python/avg.py < top-CPU_Usage-NSImage.txt               %/Volumes/RAM Disk(0)
0.737

Note: For timing purposes (since top’s CPU-usage display is in tenths of a second), I divided CPU Usage’s sample interval by ten. Normally, it samples every 0.5 sec; the two prototypes above sample every 0.05 second (that is, ¹⁄₂₀ sec instead of ¹⁄₂ sec).

This means that to compare them to 0.4, you must divide the results by ten to adjust them back to the half-second interval that a release would have. Here are the *real* results:

0.4 0.671%
NSImage 0.0737%
NSLayoutManager 0.0667%

So CPU Usage 0.5, with the cached-NSLayoutManager behavior, will use ¹⁄₁₀ as much CPU as 0.4 does. And here’s what that looks like:
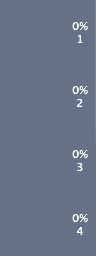
All four processors show 0% usage.

Sweet!

Inspirational posters

Saturday, May 26th, 2007

For your enjoyment:

Parallelism: beautiful It's thing. a

And an alternate version:

Threading: beautiful It's thing. a

Created with Motivator. Choice of screenshot inspired by Gus Mueller’s “viii”.

ADDED 2007-05-26: Here’s a third version using a photo from thefunniest.info.

Blinking sarcasm light

Wednesday, May 23rd, 2007

SARCASM ALERT!

In case you ever need to graphically point out that you are being sarcastic, here’s an animated GIF you can use to do that. Please copy it to your own website before use, or at least use CoralCDN, so I don’t get a big bandwidth hit if the page you use it on becomes popular.

I created it using the GlassGiant neon sign generator, Core Image Fun House (which is how I created the unlit frame: by creating a “white” version with the generator, then darkening it with an Exposure Adjust filter), and GifBuilder.

Feeling creative? Here are the original lit, white, and unlit frames, in PNG format.