Archive for the '@Uncategorized' Category

I upgraded my iBook G4 to have an SSD

Sunday, March 31st, 2024

I did take some notes which I’ll present below, but this isn’t a full how-to. I used iFixIt’s guide plus occasional reference to the official Apple Service Source repair guide (those are not strictly public but can be had from your favorite abandonware site).

For this year’s #MARCHintosh, I decided to replace my iBook G4’s 30 GB spinning-rust hard drive with an SSD.

The #Marchintosh logo, depicting a smiling compact Mac icon with a four-leaf clover and a stripe of six-color Apple rainbow.

This was my second SSD upgrade, as I’d previously replaced my G4 Cube’s hard drive with an SSD. (The pictures on that page show a hard drive because, before the SSD upgrade, I’d replaced the Cube’s hard drive with another hard drive, and that was what I originally documented on that page. Then, after that, when I decided to upgrade to an SSD, I used my own tutorial. iFixIt didn’t exist yet.)

I rather despise working on laptops, though this wasn’t as bad as I’d worried it would be. (Upgrading the memory in my Mac mini was harder. I pointedly did that as soon as the machine arrived so that it would be done and I’d never need to open the machine back up for the rest of its life.)

The thing that motivated me to go forward with it was that the iBook was absolutely filthy. It had been Mom’s, and she was a smoker in her life; she would routinely be smoking a cigarette and working on the computer, and getting so absorbed in the latter that ash would fall from her cigarette onto and into the computer. So I resolved to clean the disassembled parts as well as upgrade the storage.

For the cleaning, I mostly used paper towels wetted with diluted all-purpose cleaner. A couple small spots of deposited nail polish were resolved with cotton pads soaked with nail polish remover. It worked fine, at least so far—if I’ve started some chemical process of plastic deterioration, I don’t know it yet.

The iBook in question, closed, and visibly dirty even on the outside.
Before cleaning.

The iBook in question, closed, now thoroughly cleaned and spiffy.
After cleaning.

Once I decided the project was go, I also added in a memory upgrade, because it was less than $20 and I was already buying stuff from OWC for the operation anyway. The machine had 512 MB of RAM; now it has 1 GB. (Plus the 128 MB on the logic board.)

One key difference from the Cube upgrade: The iBook, being a laptop, doesn’t have as much space for the upgraded drive. The Cube had some wiggle room taken up by brackets; the iBook has basically none. In the Cube, I installed a standard-size SATA SSD plus a SATA-to-PATA adapter; in the iBook, that wouldn’t have fit.

So my first thought was an M.2 SSD, that being the form factor that today’s computers generally use. I ran into a problem: There are like three different signaling protocols that all run over the M.2 form factor, and M.2 correspondingly has three different keying combinations to guard against protocol mismatches (an incompatible SSD won’t physically fit, though an SSD that fits isn’t necessarily compatible). I noped out of trying to sort that out.

What I went with instead was mSATA. This form factor is kind of dying off as M.2 takes over, but Kingston still sells mSATA SSDs directly from their own website, and I found a suitable adapter on Amazon. (I buy from alternatives like Micro Center or direct from manufacturers whenever possible, but it wasn’t in this case. The manufacturer’s website links to their Amazon store.)

The two-and-a-half-inch spinning-rust hard drive, and the mSATA SSD in its IDE adapter, side by side in my hand.
The old spinning-rust drive is 30 GB; the new SSD is 256 GB.

(more…)

If you don’t have RSI, ergonomics are for you

Friday, September 29th, 2023

This was originally posted as a tweet thread back in February 2022. For this Director’s Cut Extended Remix, I’ve added the photos and applied styling.

I used my laptop as a laptop for about an hour yesterday and my wrists still hurt. It’s fading but slowly.

So I guess I don’t get to do that anymore. Split keyboard+vertical mouse or nothing.

My Matias Ergo Pro two-piece keyboard, splayed out on a lap desk sitting on my chair.My Kensington Pro Fit Ergo Vertical Wireless mouse, on a printed mousepad background on a cutting board on the (mostly flat) arm of my chair.
2023 note: I’ve since replaced this keyboard with an ErgoDox EZ.

Maybe a split keyboard and vertical mouse seem like luxuries, because that’s their market position (the high end), but I promise you there’s nothing luxurious about this.

Really it’s more that there are keyboards and pointing devices that hurt people, and those that don’t.

But I use a one-piece keyboard and a regular mouse/trackball/trackpad and I’m fine!

Well, maybe. Or you’re not injured yet. Or not enough yet to notice without trying ergonomic hardware for a week and gauging the difference.

Ergo hardware can help you stay uninjured.

I cannot emphasize enough how important prevention is. How important it is to protect your hands before they’re injured.

You can’t un-injure them. You can only avoid injury… or not.

Grieving Twitter

Monday, December 12th, 2022

Some have analogized Twitter to a sinking ship, while others have expressed anger that folks are leaving when Twitter has been so important—even life-saving—to so many.

Thing is… Twitter (the company, and very likely the website) is a sinking ship. That much is indisputable at this point. It’s dying*.

When you’re on a sinking ship, you either sprout gills or swim for it (metaphorically). The ship is going down and you will be underwater unless you leave.

(You can decide for yourself what “underwater” means in the context of Twitter. In fact, I encourage you to: What is your red line? What conditions—including both destruction of things you got from Twitter and establishment of things you abhor—would cause you to leave?)

So folks have been leaving, mainly to Mastodon and some to Cohost; I’m not surprised by the skew toward Mastodon, since Mastodon is much more Twitter-like, whereas Cohost is more Tumblr-like. There’s also Post.news, which I haven’t looked deeply at since they’ve been openly disinterested in making their website accessible.

All of this means that Twitter (the community) is dead.

Not dying. Already dead.

A community is made of its people first, and the tools available to them second. The community that was pre-Musk Twitter is sundered; split between new websites with different tools, and the old website that is in its death throes. Many of the people have gone, and their tools have changed.

Both Mastodon and Cohost have Content Warnings, a tool created to meet the needs of people with PTSD and anxiety. Both have longer content limits (Cohost has no limit at all), to enable more expressivity. Both have better visibility control, to reduce context collapse. Both have no discovery algorithm, so you entirely control what you see—you see what folks you follow have published or boosted, and nothing else. Both have search for tags only, not full text, to thwart name-search brigades.

The change in people and the change in tools will create new communities, in all these places.

Twitter is already not the same place it was just a couple of months ago. It will never be that place again. (In some sense this is always true; you never cross the same river twice.) That threshold has been crossed; the Twitter we lost, is lost.

It’s not on Mastodon, either. Mastodon is technologically similar, but not the same, as I already listed off. The set of people is different, partly because of the people who joined it years ago and haven’t been part of Twitter for some time, and partly because not everybody’s come over yet (and some won’t, or have left). Some folks have been making different following decisions there than on Twitter, so the social graph is different.

Each is now a new community.

Mastodon is not the new Twitter; it is the closest extant thing to the old Twitter, but still different. On Twitter, what’s left of the old community remains (though, as I write this, further events have caused another wave of people to say “fuck this, I’m out”) and those who remain will ride the ship into the deep, until “sprout gills” becomes truly the only alternative to leaving.

Cohost is an entirely different thing, since even before its launch. It’s a good thing; I like it there. It is not trying to be Twitter, and in some ways it is trying not to be Twitter, and on both fronts it is succeeding.

And while I call each site a community, communities are rather smaller than that. Each community is many communities, with blurry edges. Maybe the Fediverse or Cohost or some other alternative wasn’t right for you the first time, or even the second, but maybe the right mix of people is there now, ready for you to find them. And some of us are on both, to varying degrees.

Mourn the communities we have lost, and choose what communities you’ll be part of.

* I would be remiss if I neglected to mention that Twitter is not simply dying as if by consumption; it is being murdered by a dipshit billionaire with more ego than sense. Twitter’s death was foul play. None of this had to happen; a billionaire did it to us.

A thin but rigid keyboard tray for a split keyboard

Friday, May 6th, 2022

I recently switched from one-piece keyboards to two-piece keyboards—first the Matias Ergo Pro, and then the ErgoDox EZ. These keyboards enable me to separate the halves and set them at an angle to each other so my wrists don’t end up bent as I try to bring my hands in to meet the keyboard.

I’ve been using these keyboards on my lap, rather than on any kind of desk. (I’m way more comfortable seated in a relaxed posture than seated upright, but a recumbent posture puts me too far away from any desk I’ve ever encountered.)

With a single-piece keyboard, I can just lay the keyboard across my lap—the best keyboards for this are 60% to 80% keyboards, such as the Mini M; full-size keyboards (what used to be called “extended” keyboards) end up with the keypad hanging off to my right.

With a two-piece keyboard, this doesn’t work. Each half doesn’t have a flat bottom; they typically have three separate feet, particularly in the tented configuration that I’ve come to favor, where the inner side of each half is raised several centimeters, while the outer side remains more or less on the desk surface (or equivalent).

So I need a keyboard tray to be able to use a split keyboard in my lap.

In the setup I have in HB, I use a commercial lap desk with cushions underneath it and this works great. I bought a second one to bring to SF… but my setup here is different, with me sitting on my couch rather than in a gaming chair. The cushions raise the keyboard up too high in this configuration. I needed something thinner.

Fortunately, I already had a rigid work surface that I had made for painting my nails. Unfortunately, that work surface has a crease in it that doesn’t cause a problem when I’m painting my nails, but does cause a problem with supporting one of the halves of the keyboard. The ErgoDox’s feet also slipped a little on the bare cardboard, and the size wasn’t quite right.

So I made a new one—poetically enough, from the box that the commercial lap desk came in. This one is 17 by 10 inches, and has white duct tape across the upper surface and sealing all four edges.

The structure is simply two sheets of corrugated cardboard, with the corrugations of one sheet perpendicular to those of the other. One sheet is 17 by 10, while the other is 10 by 17. With one rotated 90 degrees and the two taped together into one unit, it becomes a very lightweight but rigid platform, not flexible in either axis because the corrugations along that axis prevent it.

Scan of the measurements on graph paper for the project, along with a bill of materials consisting of two sheets of cardboard (one 17 by 10, the other 10 by 17), plus white duct tape or vinyl for the surface and duct tape for the edges.

As I noted in the diagram, 17 inches is a width that works for the ErgoDox (and my separation distance), but might not work for the wider Matias Ergo Pro. The remedy for that is simple: Use wider/longer cardboard.

Photo of the keyboard tray in use, sitting on my lap, with the ErgoDox keyboard on top of it.

Masks are good and we should keep wearing them

Sunday, May 16th, 2021

First: Masks are good in their own right

Masks are stylish. Cloth masks in particular. Some of us have a variety of cloth masks that we cycle through whenever we go out, much like some people have a wardrobe of T-shirts or full outfits. The “cloth face covering” is one more way for people to aesthetically express themselves.

Me wearing a mask with a gold-colored scrolls pattern printed on a blue-and-green batik fabric.Me wearing a mask with stars printed on a blue outer-space pattern fabric.Me wearing a mask with a gold-colored ivy pattern printed on a many-colored batik fabric.

A variety of my masks—including the above masks—lain out on a table.
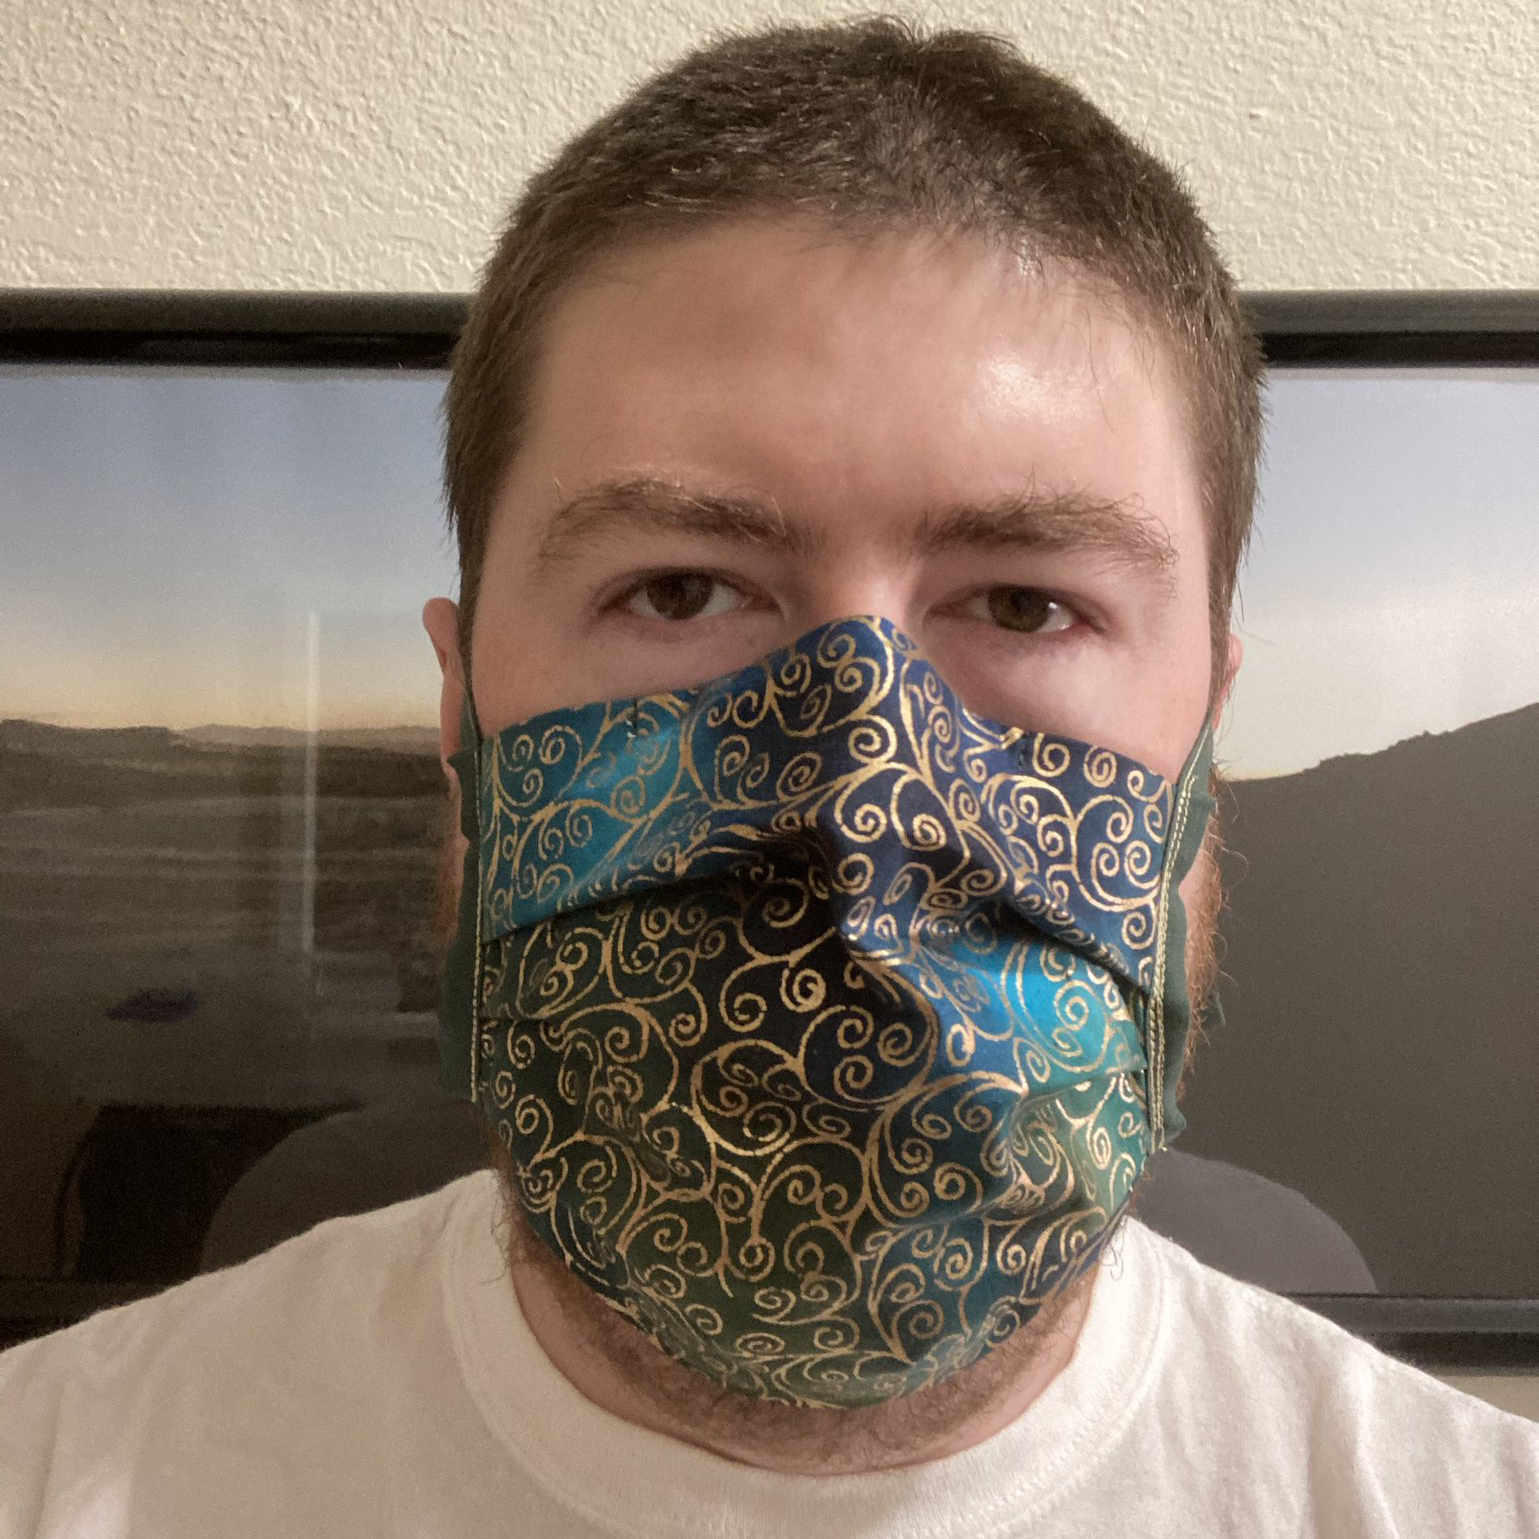
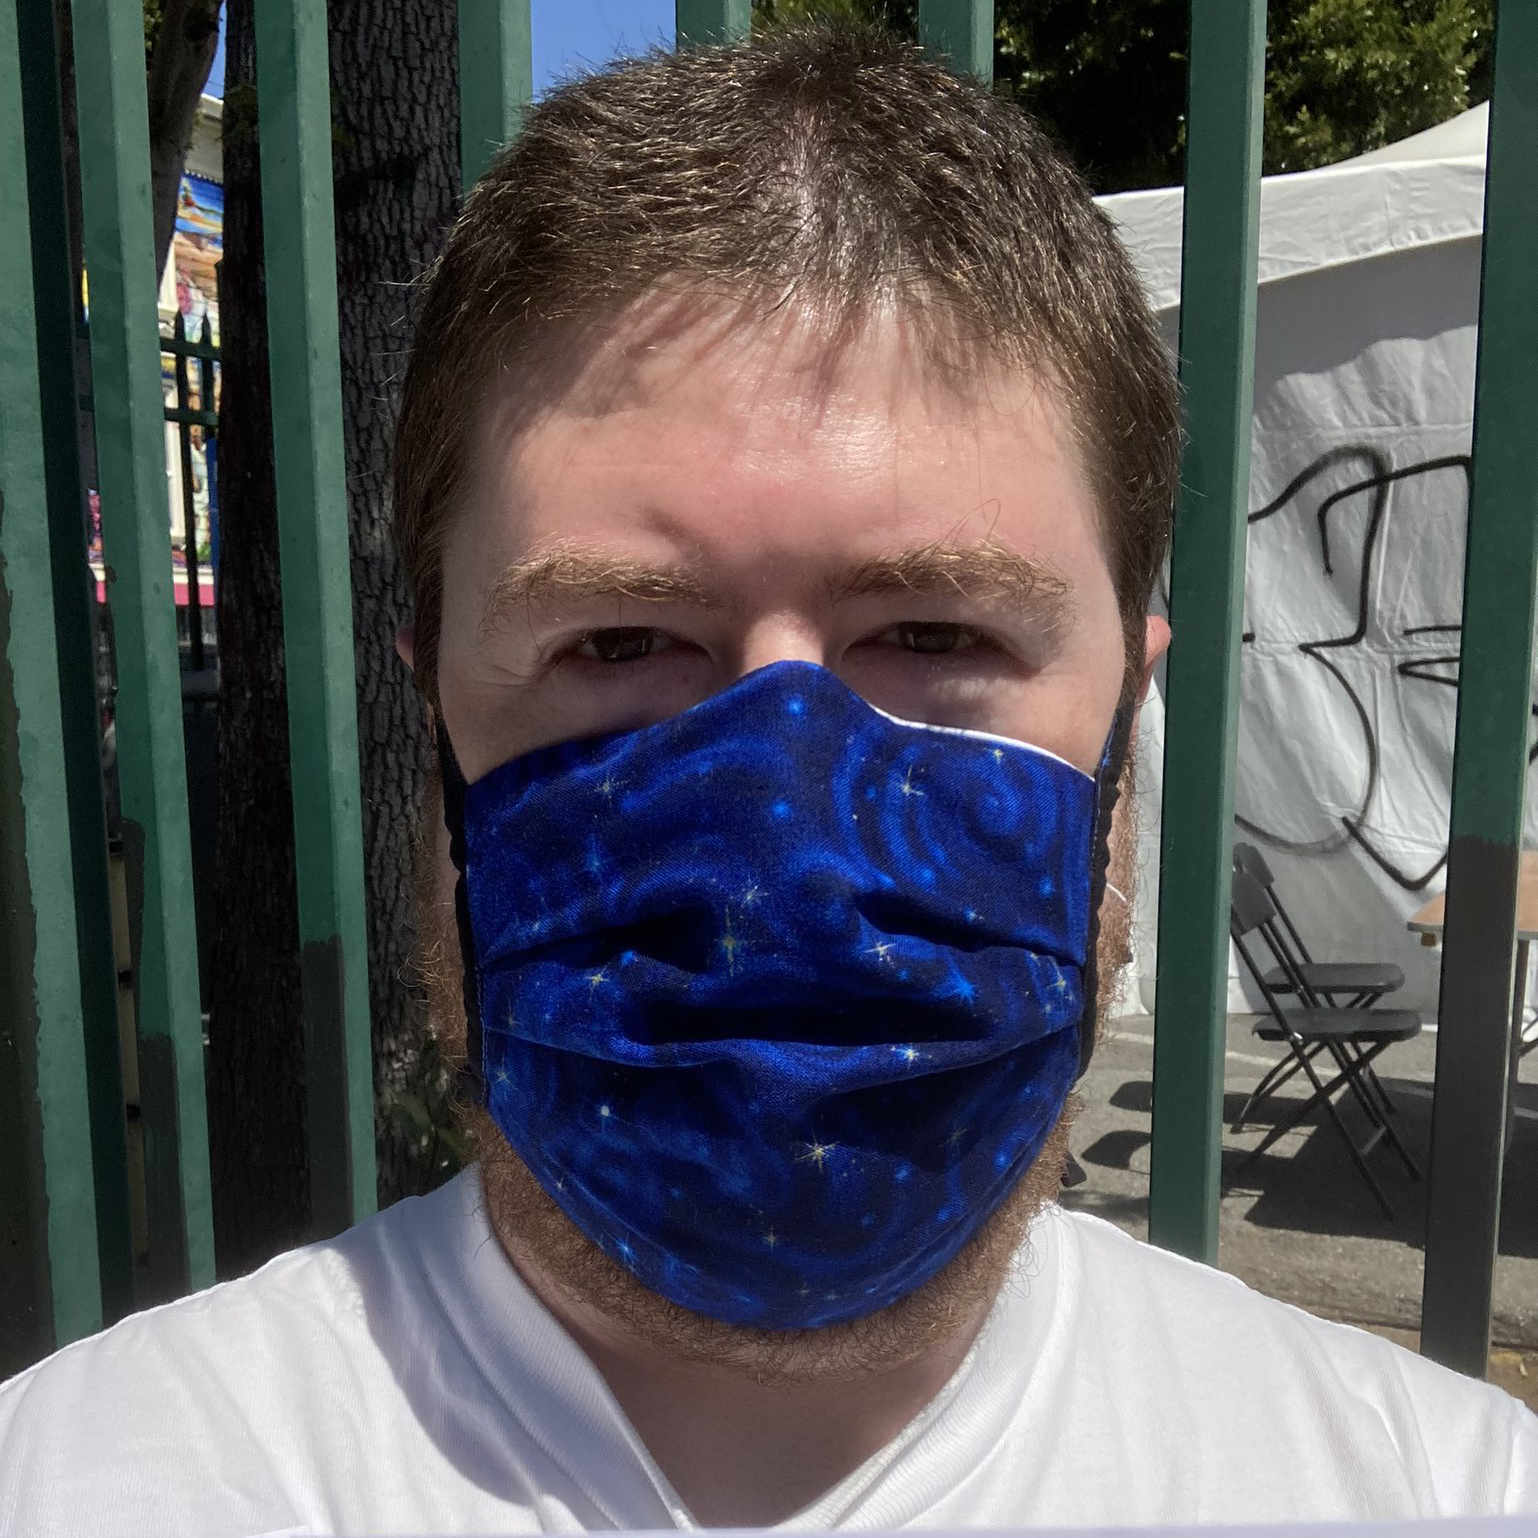
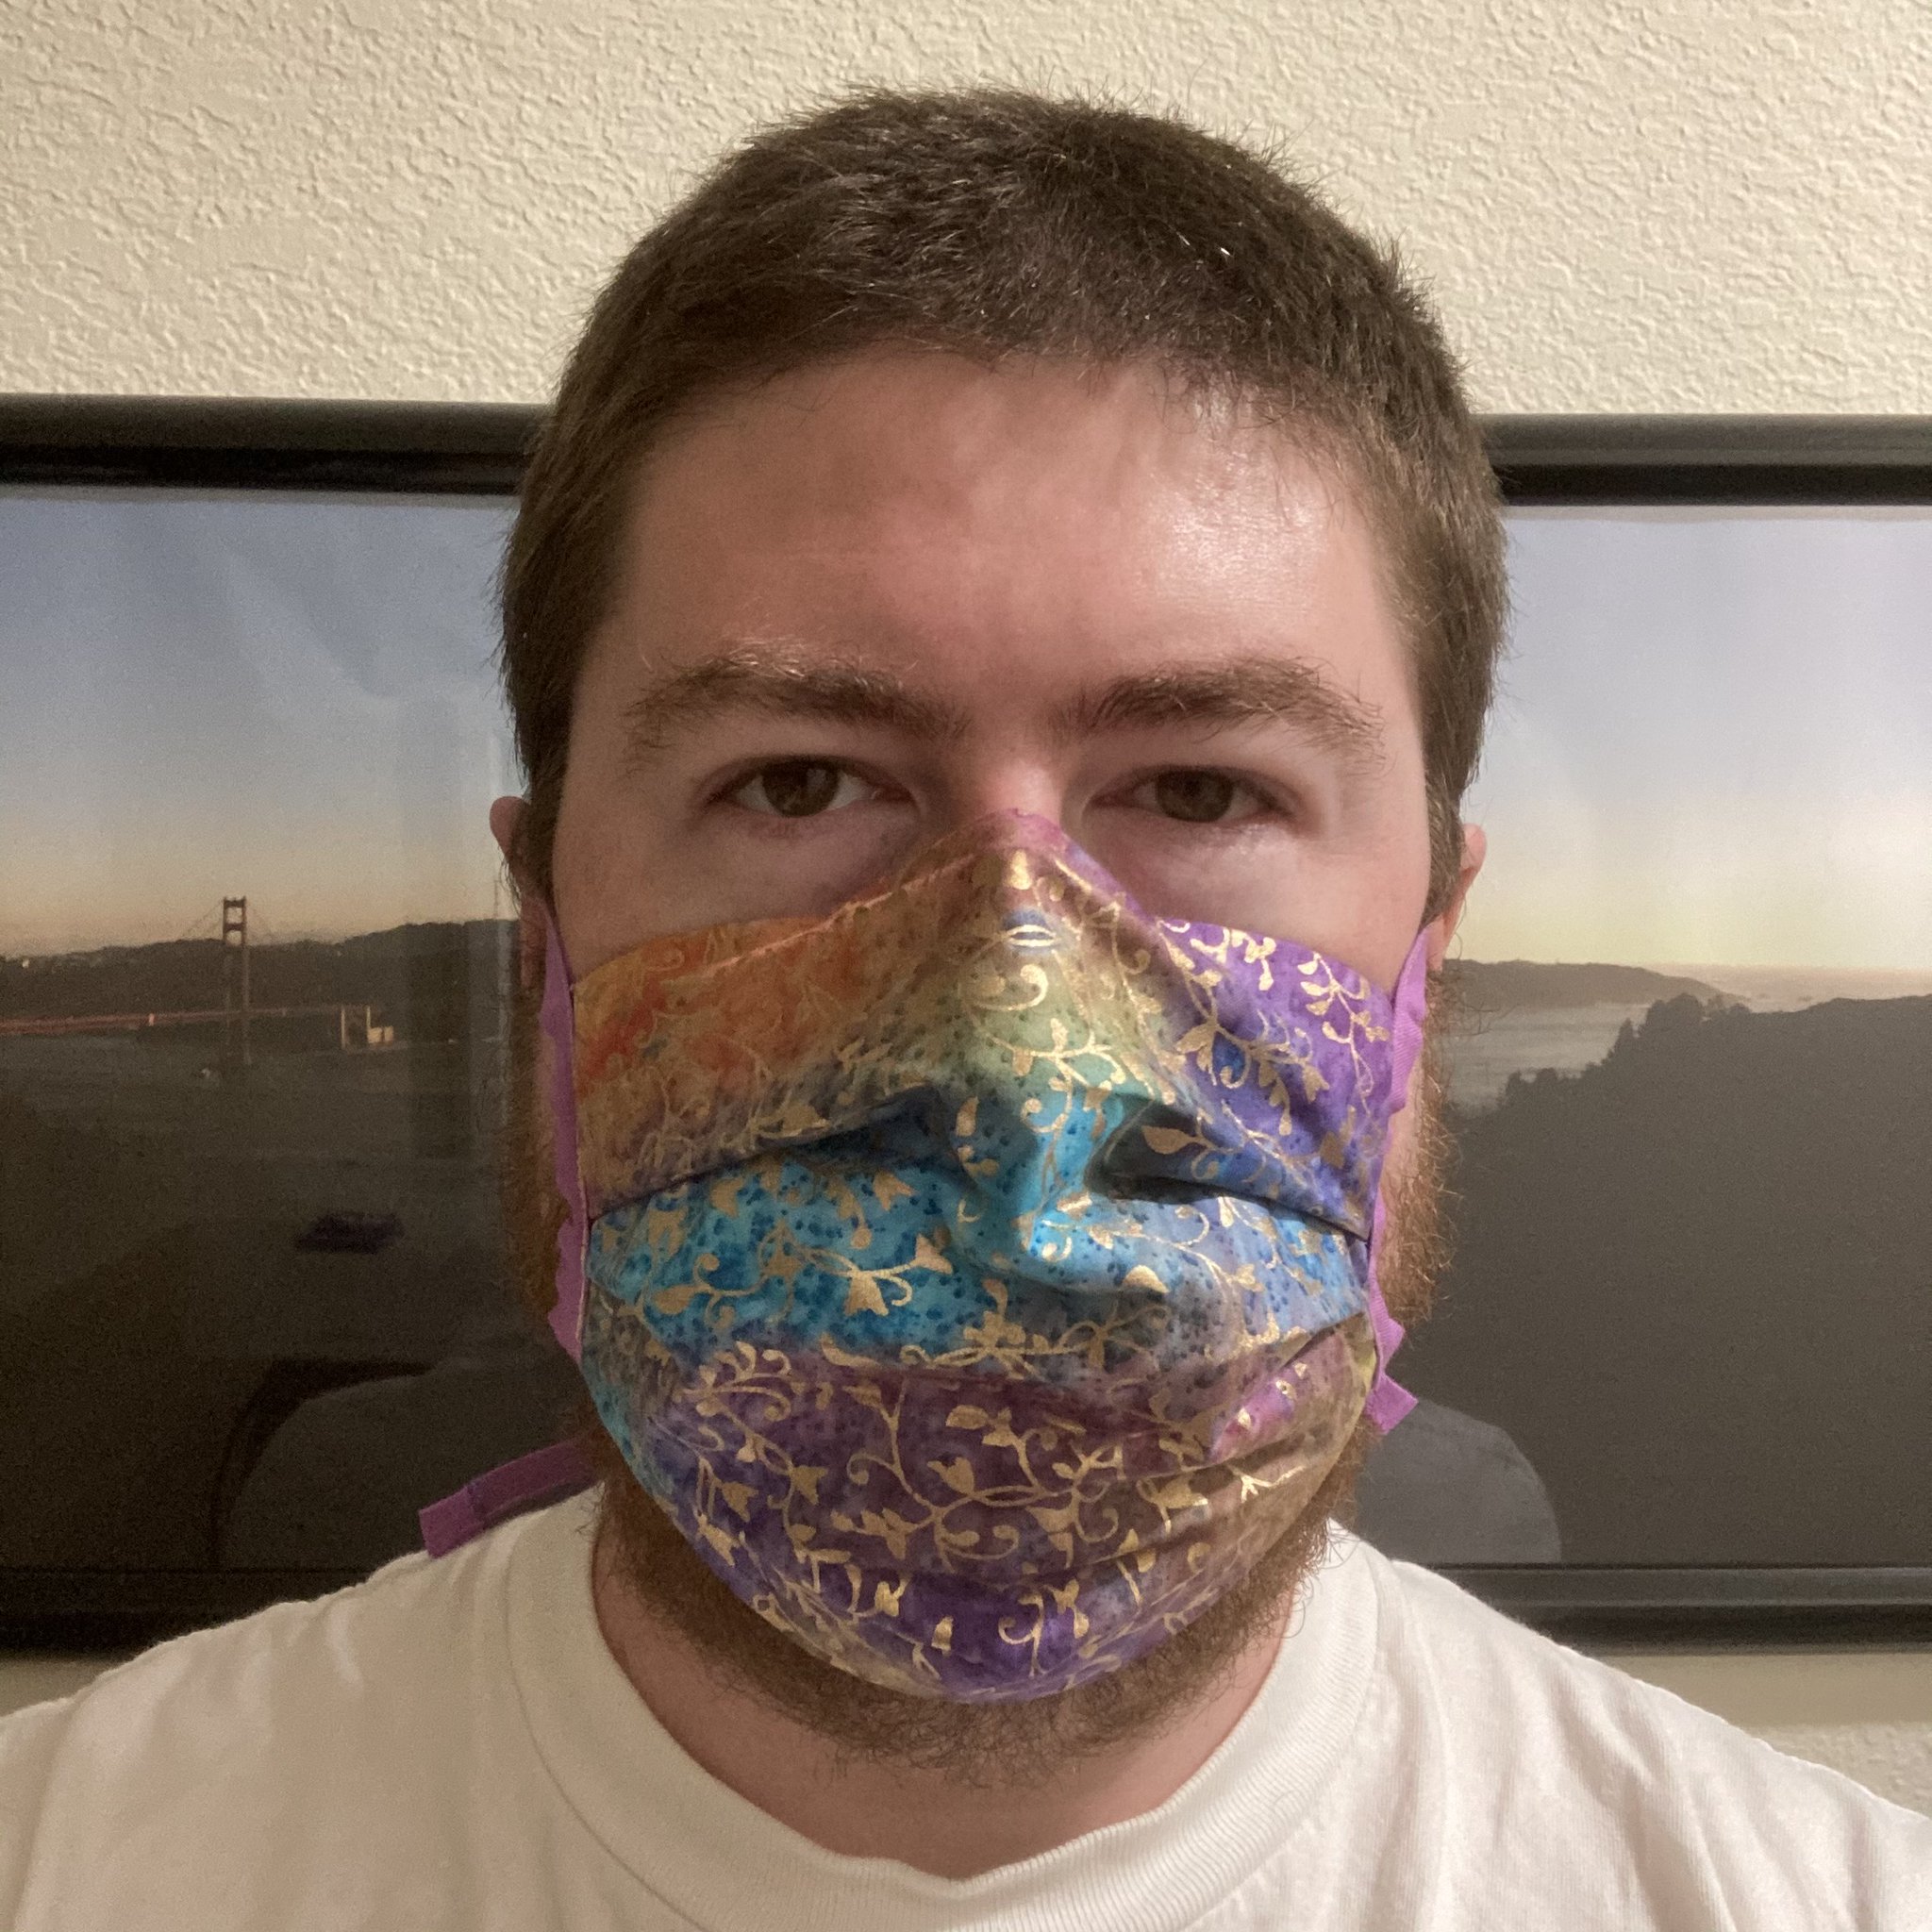
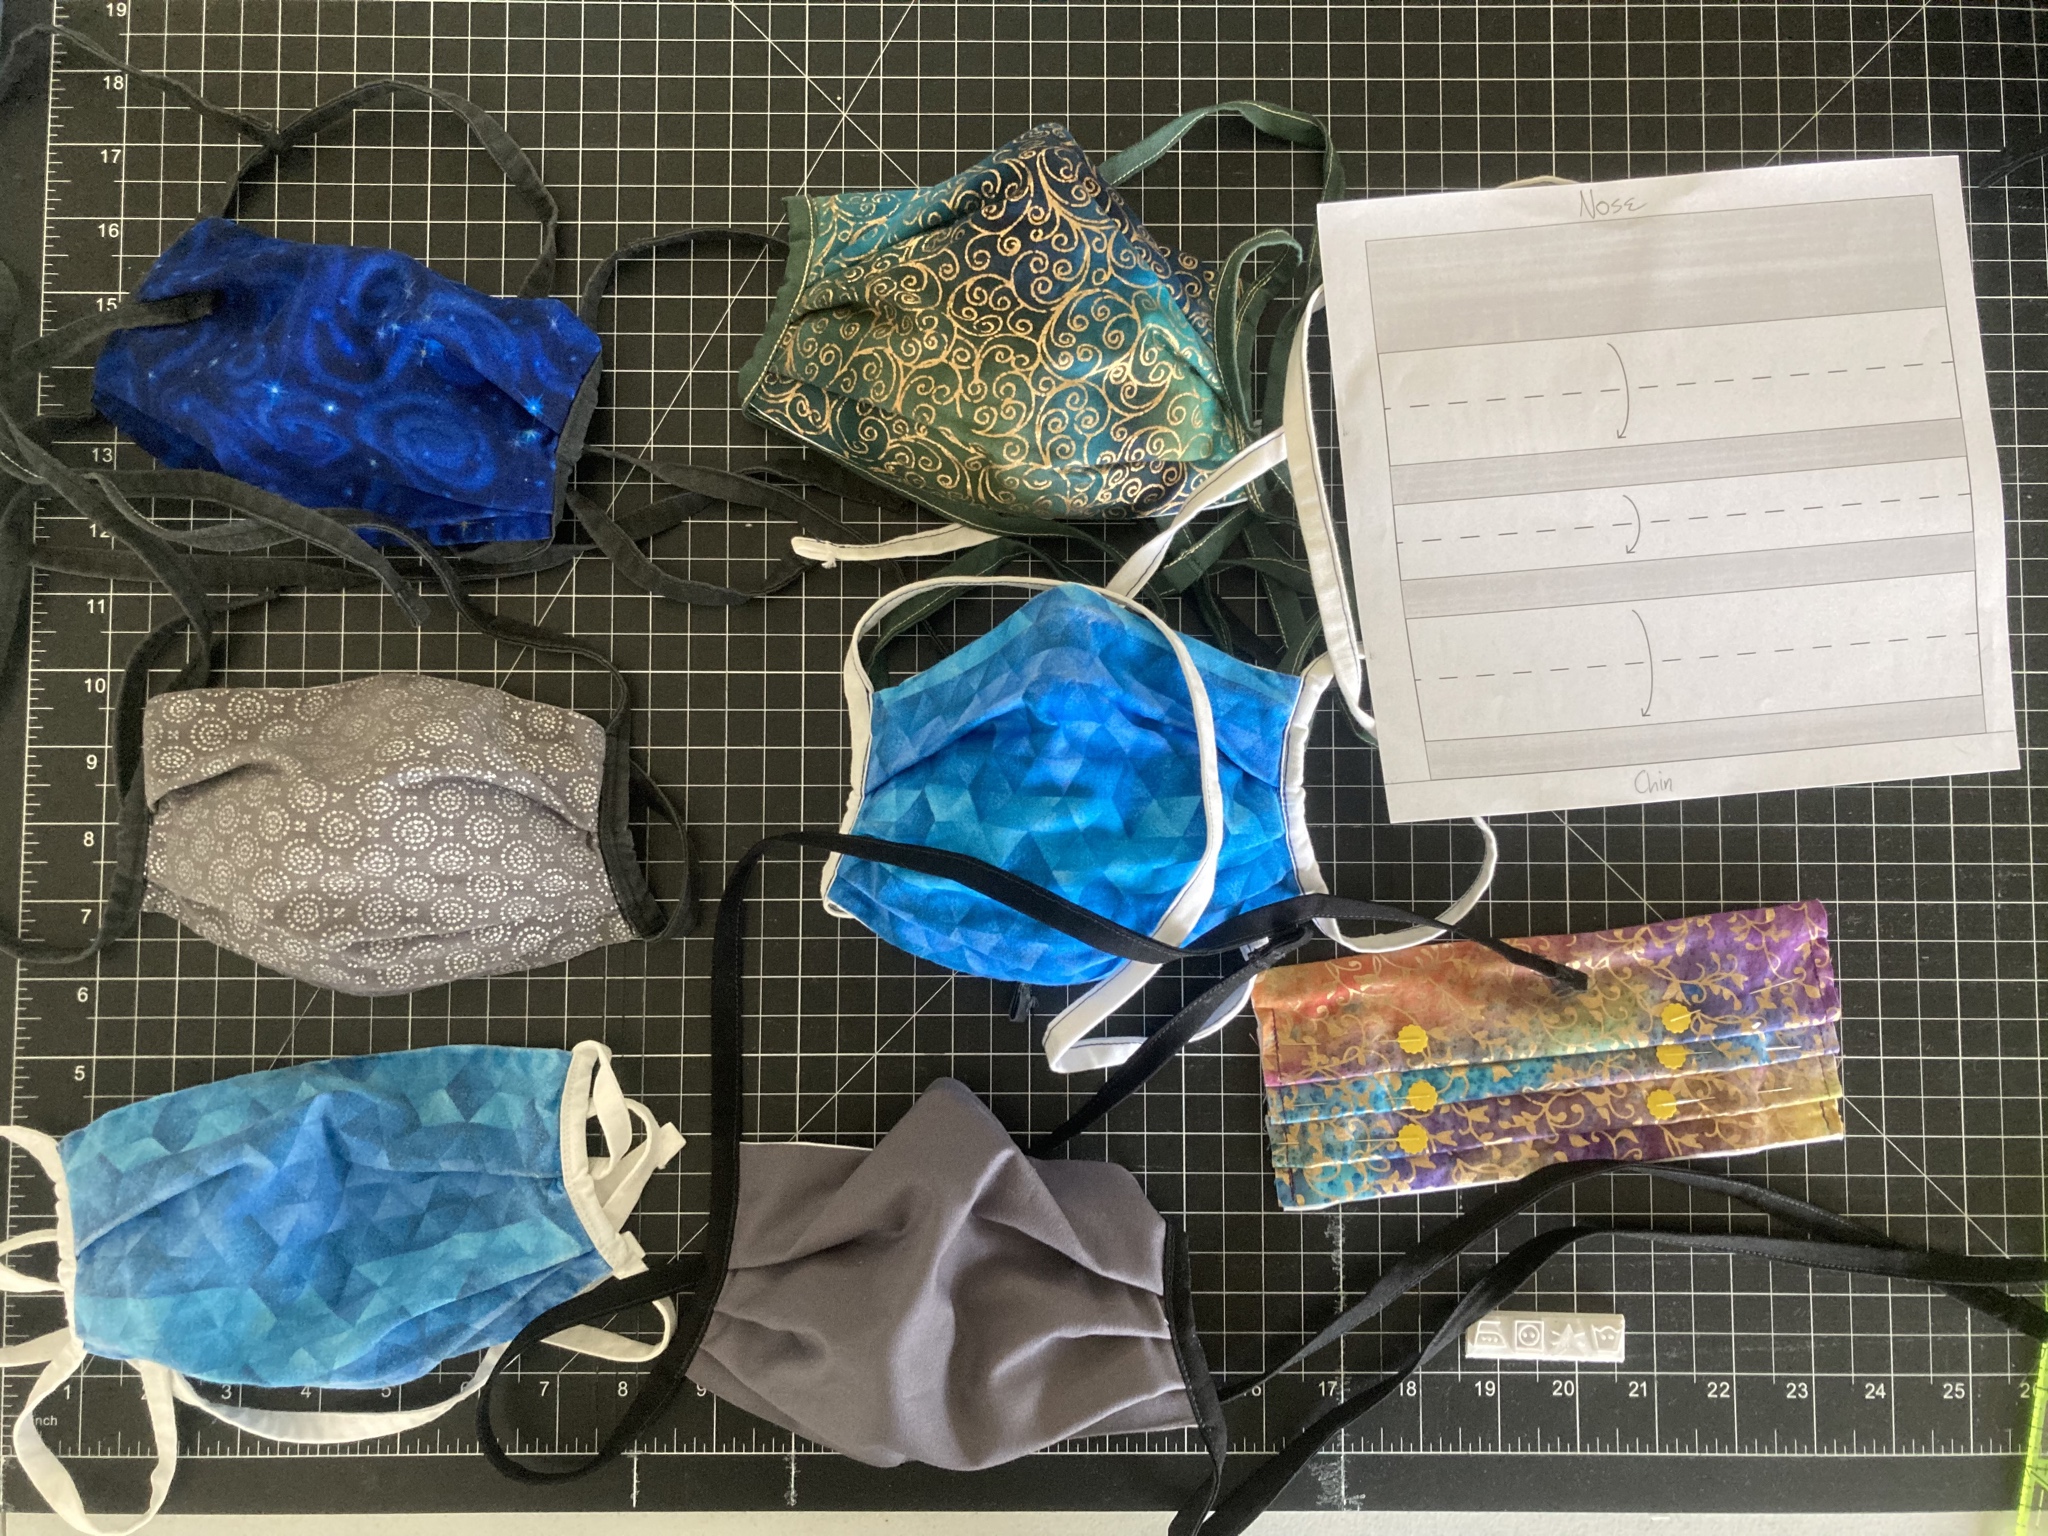
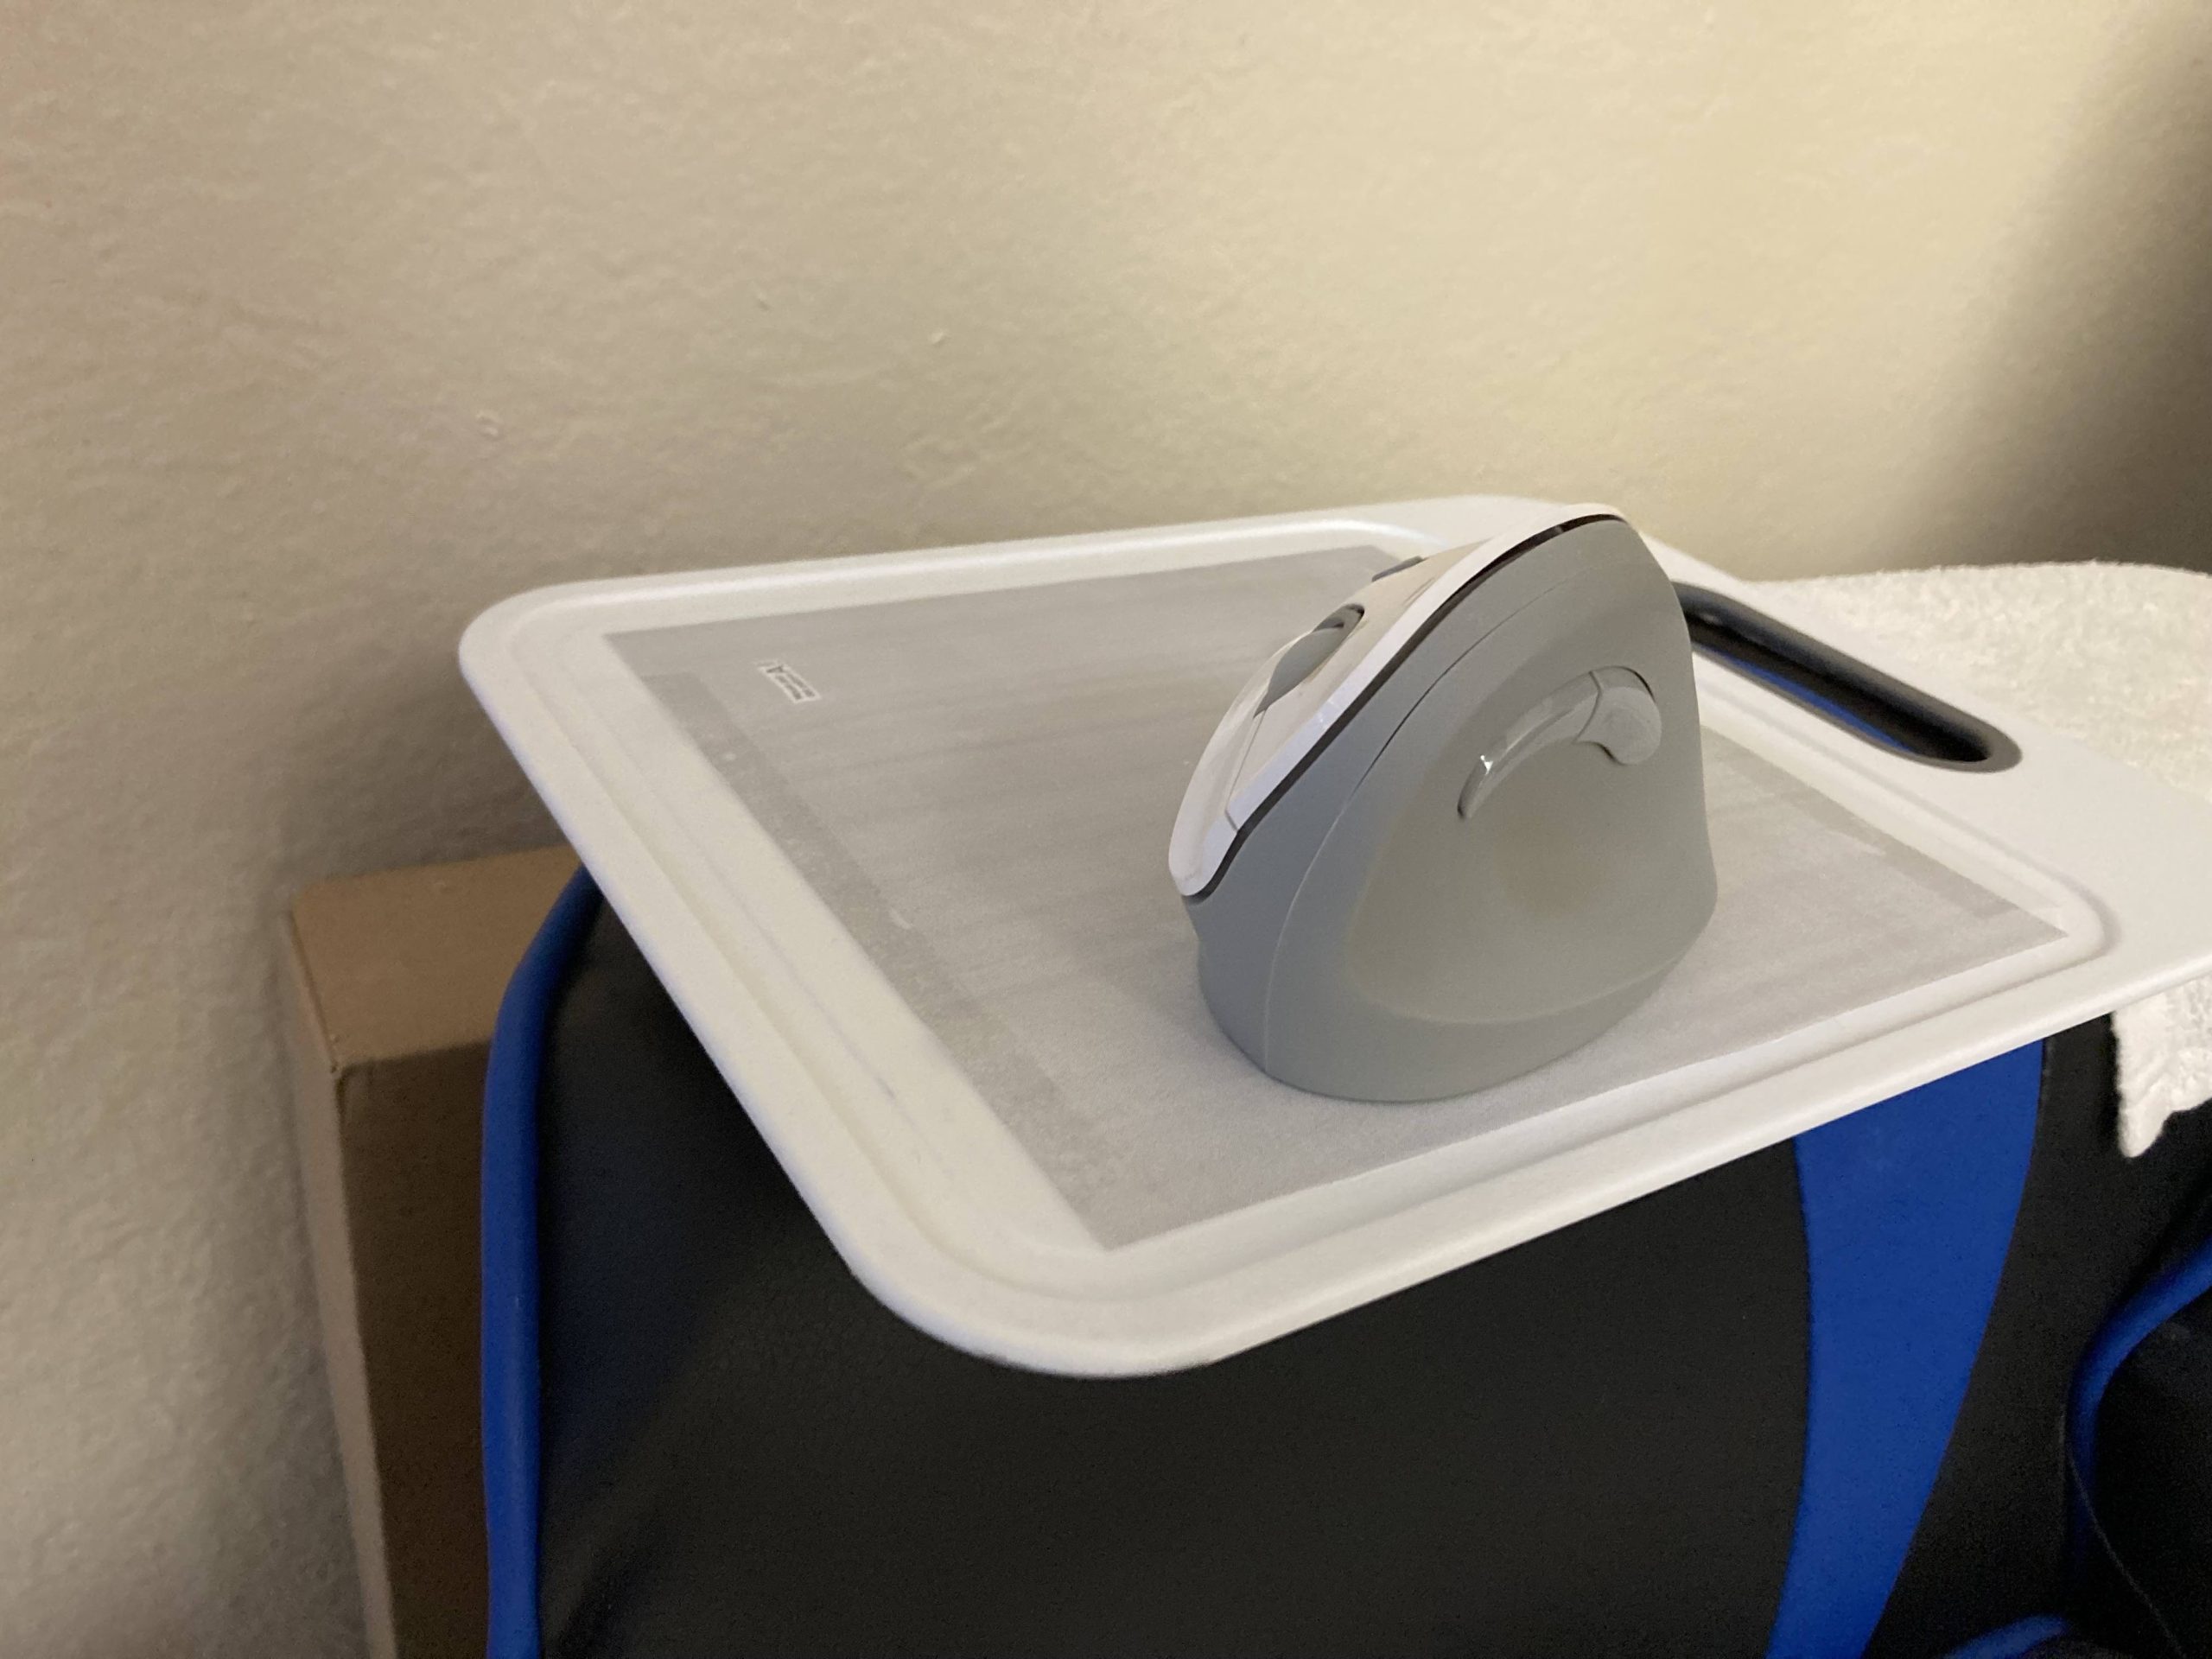
Here are some masks I’ve made (including one that was in progress at the time, seen completed in one of the photos above).

Masks prevent the spread of disease. Especially when we wear them as a community—and each and every one of us can and should contribute to that by wearing our masks.

A presentation slide, with a bullet point and couple and subordinate quotes (of example messaging) that read: “Wearing masks by both the infected and uninfected person gives the uninfected person the most protection; ‘Masking can protect you and works best for you when everyone does it’; ‘When you wear a mask, you protect others as well as yourself’”
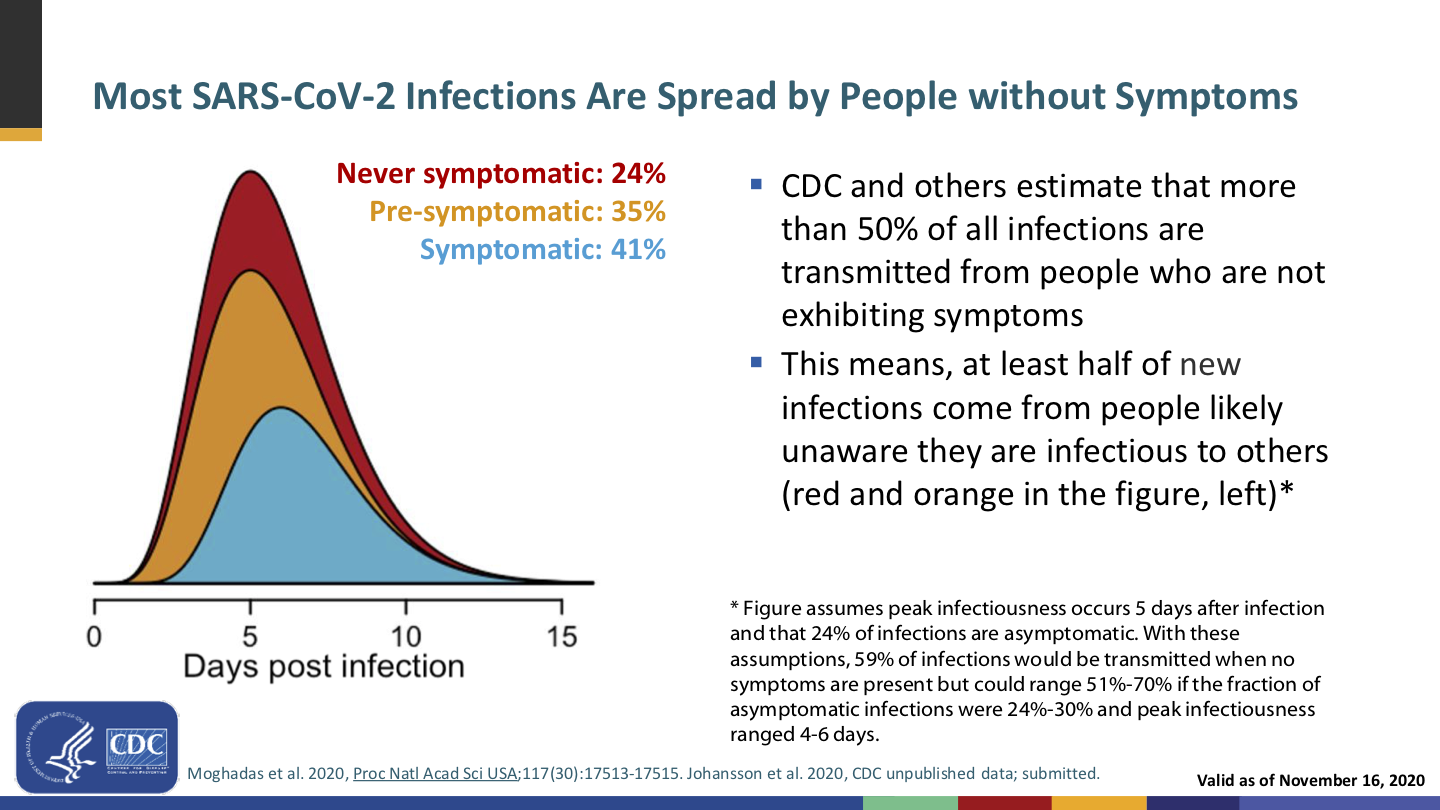
Slide from a November 2020 CDC presentation on mask necessity and effectiveness.

Remember, if you’re infected, you can spread the virus to others—who may be not-yet-vaccinated or vulnerable for other reasons—without having developed symptoms. And while the vaccines provide a staggering reduction in the chance of infection, it’s not 100%. Breakthrough infections are rare but do happen—and if you’re one of the unlucky, you can then be a vector unless you’re wearing a mask.

Another presentation slide, with a stacked graph of covid transmissions broken down by symptomaticity over time (0–15 days post infection): Asymptomatic patients peak at about 5 days and are 24% of transmissions; pre-symptomatic patients peak at the same time and are 35% of transmissions; symptomatic patients peak a day or so later and are 41% of transmissions. 59% of transmissions come from patients who weren't symptomatic at the time.
Slide from the same November 2020 CDC presentation on mask necessity and effectiveness.

Getting vaccinated protects you (and very, very well!), but wearing a mask also protects everyone around you.

We’ve known for over a hundred years that masks work; they were a key part of the response to the 1918 flu pandemic. And that was before modern mask technologies like non-woven polypropylene; today’s masks are even better, as Asian countries proved in 2003 during the SARS outbreak.

Oh, and speaking of flu… Have you seen our flu numbers? We fucking rekt the flu this season! That’s not all due to masks—it includes staying home and social distancing—but I’d love to see what we could do with the masks but without the restrictions.

A graph of deaths by US children of flu, week-by-week, over the 2017–2018, 2018–2019, 2019–2020, and 2020–2021 flu seasons. The first three show 188, 144, and 198 deaths respectively; the last has one death.
Screenshot taken 2021-05-16 of one of the graphs on CDC’s weekly US flu surveillance report.

Do we want to go back to killing 150–200 children a year?

Masks prevent the spread of disease. They reduce the chance of the wearer catching something, and they’re even better at reducing the chance of the wearer spreading something. And they’re more effective the more of us keep masking up.

Defense in depth. Positioning masks’ effectiveness as something to be left behind in favor of vaccines’ effectiveness poses a false dichotomy: that we must choose one or the other, and the vaccines are better. We should instead recognize that, well…

GIF of the main characters of the film “The Road to El Dorado” saying “Both? Both. Both is good.”

Defense in depth means layering multiple defenses to create a better defense than any single layer could achieve on its own, because even when one layer fails, other layer(s) can still stop the failure and keep you safe.

The right answer isn’t a false choice between masks or vaccines; the right answer is masks and vaccines.

Masks are a signal that “I am (still) taking this seriously and you should too”. We are still in a pandemic, and it’s not yet certain whether covid will ever be Behind Us Once And For All, or will instead become a permanent fixture of life that everyone gets sooner or later and has some percentage chance of mortality, not unlike flu, or permanent disability.

Masks communicate to everyone around you that you know covid and other airborne illnesses are dangerous and to be taken seriously, and that you are taking this simple, positive measure to protect them as well as yourself.

I have a much longer rant on the notion of “virtue signaling”, but what it boils down to is that whinging about “virtue signaling” was always disingenuous pap, and that modeling good behaviors is actually a good thing. Setting a positive example is a good thing. Leading by doing is a good thing. Fuck the haters; be a positive example and proud of it.

This is the social component of public health. It’s not enough for CDC and your state and county health departments to yell from the mountaintops “you should do X!”. The way to get everyone to do X is for everyone around them to do X. You can help by being one of those examples.

Masks protect numerous groups of people against harassment, violence, or other unpleasantness. Julia Carrie Wong wrote the definitive piece on this. You have:

It’s easy to be OK with losing masks if you don’t feel like you’re losing anything. For some folks, masks were a big net gain in ways that have nothing to do with disease transmission.

Second: Abandoning masks is premature and ill-advised

The pandemic isn’t over. As I write this, the CDC’s data tracker shows approximately 35,000 new cases of covid in the United States each day. This is not the time to start scaling back the non-pharmaceutical interventions that keep that daily number from being higher.

Lots of people still aren’t vaccinated yet. 12–15-year-olds only just became eligible for the Pfizer vaccine. That vaccine comes with a three-week period between jabs, plus the two-week period afterward for immunity to build up. It would be five weeks from now when we could consider people in the 12–15 age range protected, if we could vaccinate all of them at the same time, which we can’t.

12–15-year-olds won’t be fully vaccinated for another two months at minimum. So keep your shirt on.

On top of that, there are plenty of adults and 16- and 17-year-olds who either haven’t started or haven’t completed their vaccination series yet. Yes, some will be unreachable anti-vaxxers, but we should try to get as many as possible started, and wait until they are fully vaxxed.

And it’s not just about age—access is also a tremendous factor. Many people can’t afford to take time off work, especially up to three days for jab #2 (one day to get the jab, then up to two days of potential side effects). Some disabled people can’t get vaxxed unless people administering vaccines come to them.

Just because everyone you know is vaxxed doesn’t mean we’ve finished the roll-out.

We don’t yet know whether certain groups of people are protected by the vaccines. Particularly immunocompromised and immunosuppressed people. They can still get a vaccine, but the jury’s still out on whether it’ll actually protect them. It’s plausible (but yet to be proven) that it won’t, because the purpose of the vaccine is to train the immune system to respond to the virus’s spike proteins. If the immune system is suppressed or compromised, what can we expect from that? We don’t know yet.

For the sake of their safety, we kind of have to assume that them getting vaccinated will not be enough to protect them.

Both of these last two facts combine to mean we cannot jump to the conclusion that we have vaccinated enough people by this point for us to leave masks behind. It’s simply too early.

We don’t know yet how long immunity built by vaccination lasts. Antibodies from natural covid infection last at least 8 months, possibly longer. Covid reinfections do occur, though they are rare. With the vaccines being only a few months old, we haven’t had enough time yet to know how long vaccine-induced immunity will last.

Even if we all get vaxxed, if we all drop our masks and then the immunity fades after a year or so, covid could come roaring back.

And if that happens, it’ll be a couple of weeks of growing community transmission—likely in numerous locations all over the country and the world in parallel—before we know it. Remember, most covid transmission happens without symptoms, and each new case takes a median of 5 days to develop symptoms (if they do at all). By the time we realize that there’s a resurgent outbreak, it’ll already be a big problem.

Strong community masking can help prevent and impede such outbreaks.

CDC does not consider the social aspects of public health. This has become abundantly clear over the past year-and-a-half.

CDC does a lot of good work gathering evidence (especially that—if you want a relevant study, the CDC probably has it on their website) and maintaining updated recommendations, but sometimes, their guidance is overly skewed to what you can do to protect yourself, without consideration to social aspects like what these actions imply to other people or building interest in protecting your community.

Take the CDC’s disastrous new guidance: “Fully vaccinated people can stop wearing masks.” As a statement of actual necessity, this is true: if you’re vaccinated, your risk of disease is low and your risk of transmission is infinitesimal. It ignores the concept of defense in depth (vaccine plus mask is better than vaccine without mask), but it’s fair enough to say that a mask on a vaccinated person is no longer strictly necessary.

But consider the social aspect: We now have the implication that mask-wearers are the unvaccinated. The implied intention seems to be to incentivize vaccination—“you can leave your mask behind!”, ignoring that masks are good, actually—but I think this could send exactly the opposite message, that all these mask-wearers you still see suggest that maybe the vaccine is not such hot shit.

Further, suppose mask-wearing gets rarer down the line. Then, the implication that mask-wearers are unvaccinated could lead to some unpleasant (not to mention invasive) “why haven’t you gotten vaxxed?” questions. This is why the false dichotomy is harmful; we need people to know that both is an option.

We should be sending the message that getting vaccinated is popular, because the vaccines are good and fantastically effective, as well as free to literally anyone and by this point extremely plentiful. And that masking is also good, and you should do that, too.

Mask-abandonment as incentive to get vaccinated also supports anti-mask rhetoric. Fuck those people and their bad-faith whinging. They’ve already had more influence on public health than they deserve to have had; leave them behind and focus on promoting all of the things that actually help.

“Need to” is the wrong question. CDC and other public health authorities, at least in part motivated by trying to satisfy the bad-faith whinging of anti-maskers, have been trying to draw a precise shape dividing when you do need to wear a mask and when you don’t need to, based on vaccination status, mixing of households, distancing, indoors vs. outdoors, and on and on and fucking on.

This is the wrong question. The right question is whether you should wear a mask, and the right answer is yes.

There are exactly two exceptions:

The latter is why we shouldn’t go around policing people’s mask-wearing—they might have an actual reason that is none of your business—and why the anti-maskers are assholes for abusing that as an excuse to spread disease.

Notice how simple this is. Unless you are younger than 2 or otherwise medically contraindicated, wear a mask whenever you are outside of your home or car. Simple. Easy.

Trying to precisely circumscribe when people “need to” wear a mask and when they don’t is doomed to failure. Nobody can remember that shit. The more you complicate it, the more you ensure people will get it wrong in one direction or another, or will give up on understanding it and consequently ignore it.

If you want everyone to do the right thing, you have to keep the right thing simple:

Wear a mask whenever you are outside your home or car.

A screenshot from one of the “The Lord of The Rings” movies, showing Gandalf, Legolas, and Gimli hiking up a hill (with the others behind, out of frame), edited to have masks on all three visible faces, with the caption “Keep it simple” above and “Keep it safe” below.

Some acknowledgements

Universal masking has been rough on d/Deaf and hard-of-hearing people. Lip-readers, particularly.

I don’t have a simple answer for this. The National Association of the Deaf recommends clear masks, but those are few and far between and my understanding is they kinda suck. They have other recommendations, too, including whiteboards and phone apps and, as a last resort and only upon request, standing two meters away and pulling down your mask to talk.

I know some lip-readers wear buttons that say “Please face me—I read lips”. We may start seeing buttons that say “Please lower your mask—I read lips”, though asking disabled people to take on an expense to accommodate people without that disability is always problematic.

Certainly the vaccines—once enough people are fully vaccinated—will make it much safer to drop a non-clear mask to talk to people. I hope we do get to a point where it will be safe enough to reserve masks for when one is exhibiting symptoms of illness, and trust our vaccinations to prevent outbreaks.

We are traumatized. The pandemic has been a year-and-a-half of hell, more for some of us than others, but even folks like me who are privileged and generally introverted have still had a rough time of it.

I do think this has gone both ways: There are people who are hesitant to give up the safety of masks, as well as people who just want to “go back to normal”—including no more masks—right the hell now. I think these are different expressions of the same year+ of trauma.

Give people time and space to come out of this in their own way, at their own pace. Don’t rush people “back to normal”—all that does is compound the harm and prolong the pandemic.

At the same time, be compassionate with those who want the pandemic to be over (not to be confused with covid deniers)—we all want the pandemic to be over, and in order to make that happen, it’s important that we not rush to abandon our protective measures prematurely. Short cuts make long delays.

In conclusion

Do otherwise-healthy, fully-vaccinated people need to wear masks? I won’t try to argue against the evidence: Generally not most of the time.

Can we wear masks? Yes, especially when many of us do it and normalize it.

Should we wear masks? Yes. Cloth masks can look cool as hell and wearing masks helps protect everyone. You especially should wear a mask when you are sick.

Will we wear masks? That’s up to us. The new guidance doesn’t have to stop us.

Will I continue wearing my masks? Abso-fucking-lutely.

Cooling yourself without air conditioning

Sunday, September 6th, 2020

San Francisco is notorious for forgoing air conditioning in most homes, since we ostensibly “don’t need it”. But the climate emergency is rapidly changing that, and as I write this, it’s powerful hot out there.

In previous years, we’ve been able to go to malls and movie theaters and other air-conditioned venues to cool off. But being in any such building is a risk now due to the pandemic, and going outside at all may not be an attractive prospect due to wildfire smoke.

So, from my experience cooling myself off in multiple pre-AC ways, here are some ways to keep cool at home without air conditioning.

  • Drink water. Even straight-from-the-tap is better than nothing—remaining hydrated will help you self-cool.
  • If your fridge doesn’t have a cold water tap, put another glass of water in the fridge. When your current glass runs dry, refill it and swap it with the one in the fridge.
  • Take a shower or bath. It’ll wash the sweat off and the water will help cool you—as will the air over your wet skin when you get out.
  • Point a fan at yourself and spray yourself with water from a spray bottle. This is essentially a manual swamp-cooler. The water will help conduct heat out of you into the wind, and the water’s evaporation from your skin will cool you further.

How to QA

Monday, July 3rd, 2017

In my day job, I’m a QA (quality assurance) engineer for a Large Software Company. Today I’ll tell you how to prepare yourself to do a job like mine.

Fair warning: “QA” is a big tent; the details of a QA job vary widely, and your QA job may be very different from mine.

File bugs

(Ira Glass voice) File a lot of bugs. File a huge volume of bugs.

The ultimate responsibility of a QA team overall, and of QA engineers individually, is to produce actionable bug reports that can and do get fixed. The details vary widely, but everything comes back to that.

A good bug report says:

  • what you did
  • what you expected to happen
  • what actually happened, and how that differed

That’s the minimum, actually. That’s the least that’s needed for a bug report to be actionable.

Ideally, a bug report should also include needed diagnostic info (such as a sysdiagnose on Apple platforms), screenshots/video if applicable—as much info as possible, at least at first, to be sorted through for the gems of info that illuminate the actual problem. As a QA engineer, providing as much of this info you can gather is Actually Your Job.

Ah, but what to file? If you’re QAing something manually, you’re looking for:

  • any sort of friction (possible interface design issues)
  • any sort of fault (crashes, hangs, data loss)
  • anything in between (anything that did not do what you expected it to do)
  • anything you don’t know what you expect it to do (can be a design/empathy-for-the-user issue)

Also test anything that had been broken before. Look for regressions (previous problem returned) or new problems (“OK, you fixed X, but now it has problem Y”).

Practice, practice, practice

For filing formal bug reports, two good ways are filing Apple developer bugs and filing bugs with open-source projects.

A few caveats re open-source:

  • Many open-source projects need fixes more than they need more bug reports, so don’t be surprised if folks don’t rush to thank you for adding to the pile. Concentrate on high-value bugs (security vulnerabilities, crashes, providing desperately-needed steps to reproduce) rather than nitpicks. (Making this judgment call is itself something that’s valuable to practice.)
  • Search for duplicates first. Apple actually generally likes duplicates and uses them to influence triage and prioritization decisions, but open-source projects may resent the extra scut work of duping bugs together. (Finding existing bug reports is an underrated skill that is also valuable to practice.)
  • I’m a cishet white guy. Your mileage may vary a lot regarding how you and your contributions are received if you are not—anything from well-intentioned over-helpfulness (mansplaining, assumed noviceness) to outright misogyny/racism/anti-trans assholery.

Some open-source projects do code review and/or API review, which can be good practice for spotting designs that invite bugs (random example: “you’re taking a pointer but not the size of the buffer, so the API can’t check that it won’t go out of bounds”).

In that sort of setting, practice asking questions. These could be clarifying (“what does it mean if this returns nil/0?” “This is typed as a String. Are there constants, or what sort of strings should folks pass here?”) or more Socratic (“what does this API do if I pass a pointer to a buffer that’s too small? how does it detect that?”). Even if the immediate response is “that can’t happen” or “don’t do that”, established members of the community/team may back up your question with pressure to resolve the issue (“this should take a length with the buffer, or better yet return a Data”).

Lastly, volunteer for beta tests. I’ve beta-tested Flying Meat’s Acorn once or twice, and I think Panic have also solicited beta testers in the past. Beta-testing is extremely good practice for exploring an in-development product looking for friction and faults and writing up your findings.

As a beta tester, write up everything. Don’t be shy—if it looks wrong, write it up. I have sent in multiple pages of issues and you know what? That makes you worth your weight in gold. (90% of volunteer beta testers are just there for the possibility of a free license. Any developer who’s running a beta test program wants bug reports. They want them urgently—preferably while the product is still in beta.) Even if half the stuff on my list is stuff they meant to do, it’s still worth a second look if a beta tester (or more than one) objects to it, and the other half of the stuff on my list is stuff they may not want to ship with.

The QA mindset

Use your imagination. Try things you wouldn’t ordinarily. Follow the “what does that do?” impulse. Find the cold paths.

Everything that the product engineers thought of is probably really well-tested, and any issues that remain have turned into invisible corners. Your job is to remind them of the invisible corners and tell them about the things they haven’t encountered at all.

Question everything. Is that design optimal? Is the UI copy clear? Could a new user understand both? Was that actually the correct result? Was it the best result?

If you find yourself asking “What does that do?”, that can be a sign of inaccessibility to novices. Inversely, you should learn the product’s domain so you can spot things that don’t make sense in the domain. Try to develop the ability to do both: know the product’s domain and simultaneously spot barriers in the product to users entering that domain.

Be an advocate for users

Make sure the interface is accessible (overly-similar names can cause problems for dyslexic folks; reliance on color or images can cause problems for color-blind or visually-impaired folks).

Familiarize yourself with accessibility tools (on the Mac: Accessibility Inspector, everything in the Accessibility control panel, SimDaltonism) and use them on the product, and file bugs when you get stymied.

Challenge ableist/misogynistic/gender-binarist/racist/otherwise-problematic copy or artwork, using the dual justifications of “this is the right thing to do” and “not doing this is going to repel users/customers and/or cause PR trouble”.

Your QA job may vary

As I mentioned above, “QA” is a big tent. What I’ve described is an important baseline mindset and skillset to a QA engineer, but major portions of an individual QA job could be more sysadmin-oriented (e.g., administering an automated testing or CI fleet) and/or include work with specialized, company-specific internal tools that you’ll have no way to practice the use of outside of that department.

Know at least one scripting language such as Python or Ruby, whether for use in your own QA work (e.g., generating test data, filtering logs) or for working on automation systems (e.g., maintaining Python or JavaScript scripts that drive UI tests). If you’re starting from scratch (and absent any particular job-specific requirements), I’d recommend Python, which you can pick up in a few months, and from which you can learn similar languages like Ruby afterward.

Especially as more automated QA (unit testing, UI automation) becomes more the norm, I’d strongly recommend developing your system administration skills on any platforms you may end up working on. It’s been awhile since I had to start from scratch on this, so I invite you to suggest resources in the comments for learning system administration (on the Mac or otherwise) in 2017.

Chess variant idea(s)

Saturday, May 13th, 2017

Each player has one spy among their opponent’s pieces.

On your own turn, you can switch out one of your opponent’s pieces for an equivalent piece in your color (e.g., black rook for white rook), then move it as one of your own. Ever after, it is one of your pieces.

Possible variants:

  • Reveal your spy on your opponent’s turn instead of your own (you take their turn instead of them taking it).
  • Reveal your spy on any turn.
  • More than two spies.
  • Unlimited spies.
  • Double agents (after revealing your spy, your opponent can reveal that it was their own spy, taking the piece back, ending your control of it).
  • Arbitrary-multiplier agents (revealing a double agent does not end control: a N-ple agent can always be revealed to be an N+1-ple agent).
  • A requirement that you choose your spy beforehand and seal the knowledge in an envelope (rather than choosing the spy to “reveal” at any time). Open the envelope when you reveal your spy.

I don’t know enough about chess to be able to predict how well this would work, or whether anyone has thought of this before (it’s quite likely).

Leather dice bag project

Sunday, May 7th, 2017

Last year, I took a sewing class and bought a sewing machine. Since then, I’ve taken another sewing class, bought another sewing machine, and done my first solo project: a leather dice bag, to keep my D&D dice in. (I was keeping them in the tube they came in, but it’s harder to get the dice back in than just pouring them into a bag, and it doesn’t look anywhere near as cool.)

This wasn’t the first drawstring bag I’d made; I’d done one previously at the first sewing class (there’s a whirlwind tour of operating a sewing machine and then they drop you straight into making things; it rocks), and I made a couple of prototypes from cheap muslin before I started actually sewing the leather.

This was the first time I’d worked with leather, however, and that was interesting. Leather is grippier than most fabrics, so you actually need to use a different presser foot on your sewing machine—specifically, a roller foot. Fortunately, I’d bought a no-name variety pack of presser feet off Amazon Warehouse Deals awhile back, so I had one ready to go.

This is largely going to be a photo tour; I took photos the whole way through the project. I posted the photos on Flickr and will be embedding them here.

(more…)

Super simple solder spool spindle

Monday, November 14th, 2016

(Also works for spools of wire.)

  • One ³⁄₈″-inner-diameter galvanized pipe cap
  • One ³⁄₈″-inner-diameter 4″- or 5″-long galvanized pipe nipple
  • One ³⁄₈″-inner-diameter to ¹⁄₂″-inner-diameter galvanized pipe reducer
  • One ¹⁄₂″-inner-diameter coupler
  • One ¹⁄₂″-inner-diameter floor flange

Screw them all together, in the reverse order, putting the cap on last after you put the spools onto the pipe.

Photo of my solder spindle, along with a prototype of it holding some wire spools.
Left: My solder spindle built from the above recipe. This is with the 5″ pipe nipple.
Right: My wire spindle, built using ¹⁄₂″-inner-diameter all the way down, which it turns out is too big for one of the solder spools. (It was the first draft; the final spindle on the left is the second iteration.)

Learning to solder with the Make kit

Sunday, October 30th, 2016

I bought the Make: Getting Started with Soldering Kit at the Bay Area Maker Faire earlier this year. I recently completed the set of blinky badges included.

The one on the far left is from months ago. I’ve improved a lot since then, as seen by the rest of the badges.

It’s a good start, but incomplete. You will also need:

  • Goggles. The web page for the kit explicitly acknowledges this. You need eye protection because a blob of solder can go flying when you’re cleaning your iron. This happened to me—fortunately it didn’t go in my eye, but I made damn sure right then to get out my safety glasses and wear them for all further soldering.

    I had the freebie Google-branded safety glasses that they hand out at Maker Faires, but if you don’t have any, get some.

  • A soldering iron that isn’t trash. The iron included in the kit takes forever to heat up, and it’s oxidising all the while. Don’t waste time and energy on it—spend the extra $50 or so to get a good iron.

    Mine is a Weller WES51; it heats to operating temperature in under a minute, and has an LED to indicate when it’s ready.

  • A desoldering iron. I found trying to desolder my mistakes using the included solder-sucker tricky. It might have gone better with the better soldering iron, but I already had this thing from Radio Shack by then. It’s not ideal, particularly in how long it takes to heat up, but it’s still better than an unheated desoldering pump.

    Note that you need to tin the tip of a desoldering iron just the same as a soldering iron. In this case, the “tip” is the flat, ring-shaped surface directly around the hole. Lay some solder across the hole, then suck in any excess and spit it out onto your sponge.

  • Tip cleaning wire. I use this Hakko model. The wad of metal is an abrasive cleaner that you’ll need any time you get too much build-up on the tip and the wet sponge isn’t enough. Ideally that should be rare, but if you find yourself unable to tin your tip because the solder won’t melt or won’t adhere (“dewetting”) and the wet sponge doesn’t help, you probably need to jam your tip around in one of these for a bit.

  • Educational resources. The Make kit comes with a little booklet that isn’t bad, but I needed other sources of info:

Normal

Monday, September 12th, 2016

I just got this ad for Jane Kim, who’s running for State Senate here in California:

“JOIN US as we work to lift more families into the middle class through better public education”! and “Median Annual Wage for City College Graduates: $59,800. Median Annual Wage for High School Graduates: $48,700”

Leaving aside the matters of whether those are livable wages in the City, particularly after taxes and any available savings contributions, and especially for “families” as stated in the headline…

“Join us as we work to lift more families into the middle class…”

A “middle class” necessarily implies a lower class and a higher class.

Right off the bat, this proposition does not even consider lifting families into the upper class. Just the middle class—that’ll do for now, right?

Lifting “more families into the middle class” implies not eliminating the middle class—there’ll still be one, which means there’ll still be a lower class, which means there’ll still be people/families in it.

Certainly this proposition does not suggest ending classes altogether—no; there’ll still be classes, at least three of them. And some will be in the upper class and some will be in the lower class and hopefully more of the latter will move up… to the middle.

Oh, OK.

I feel like this is a lukewarm dish. That’s all you’ve got to offer? You want to make this not only a headline on your flyer, but literally the entire topic of an entire flyer?

I’m not even saying it’s a bad idea. Just… it lacks ambition. It feels resigned. This is the best we can do, it implies.

Really?

NB: I feel I should make explicit that I’m not against Kim necessarily; I haven’t looked at any other candidates. And maybe she’s got lots of good policies and/or ideas. Just, this one ad caught my eye and got under my skin.

My 3D printing setup

Saturday, January 10th, 2015

Here’s what I have today:

Hardware

Photo of my 3D printer (1), with a glass plate (2) and small piece of blue painter's tape (3) on the print bed, an SD card (4) in its slot, a USB fan (5) outside, a USB strip light (6) inside, and a cuticle nipper (7) outside.

  1. The 3D printer is a PowerSpec 3D Pro from Micro Center. I believe it’s a rebrand of the FlashForge Creator Pro. For $800 (that was on Black Friday sale; it’s normally a kilobuck), you get a decent printer with two extruders and a heated bed. It fared average in Make magazine’s 2014 comparison, and I agreed with their assessment on the whole.

    So far, I’ve only printed PLA, and I’m happy with that. I have no reason at present to switch to ABS.

  2. The glass plate is from a dollar store picture frame. I had a choice between 5×7″ (smaller than the build platform) and 8×10″ (larger); I went smaller, which worked out well. A simple 1 mm shim was all I needed to adjust the platform height to offset the thickness of the plate.

    The printer comes with Kapton tape applied to the print bed, and I have a roll of it from which I’ve replaced the tape once, but now that I’m printing on glass, I don’t think I’ll go back to Kapton. I may change my mind if I start printing ABS.

  3. This is blue painter’s tape, on a corner of the print bed. Overrated, in my experience, but its terribleness at PLA adhesion is what makes it great for this specific purpose: prints I export with Simplify3D (more on that below) start with a glob of plastic in this corner, and having that land on painter’s tape makes it easy to remove whenever I want.

  4. The SD card came with the printer. I’ve never connected the printer to my computer; I always run it autonomously, using the controls on the front.

  5. I turn on this USB fan (Walgreens seasonal item) after a print to cool off the print and print bed. Once they’ve cooled enough, the part stops sticking to the glass and I can just pick it up—no pulling or prying required. This is the major advantage of glass.

  6. Hanging down into the printer is a wonderful little USB gooseneck strip light. The printer has its own lighting, but it’s top down, so the area under the extruders is in shadow. Lighting from the side gives me a better view of the print action.

  7. The cuticle nipper is among the tools I use to refine finished prints. They’re great for clipping off tiny burrs on edges and corners. I also have a nail file (they come in four-packs at the dollar store, and I don’t need that many nail files for my hands) that I use for similar purposes, including cleaning up where the cuticle nipper left off. Filing/sanding is one area where I feel my toolset is incomplete.

Not shown:

  • Two rolls of PLA. On the spindles are one “clear” (more like translucent) and one white. The white currently isn’t even loaded into the printer; I could swap in another spool at any time.
  • Other rolls of PLA. I have more white, some “natural” that I suspect may be equivalent to the “clear”, at least one spool of black, and half a kg of red (I want to make a pommel for Ikea’s red wind-up flashlight, and I want the colors to match).
  • A roll of PVA. I haven’t used it yet, but its use in 3D printing is as a support material in PLA parts. You can use PVA to support bridges and overhangs, then dunk the part in water to dissolve the PLA away.
  • The remaining Kapton tape.
  • Two spatulas. One is just a normal metal spatula from Daiso. The other is an extra-wide “fish” spatula from Target’s summer section, bought on clearance after summer ended. I’ve only used that a couple of times, and I basically haven’t touched either since switching from Kapton to glass.
  • Long cross tweezers, for extracting the odd bit of scrap plastic from the printer while the part is printing, or from the hot end while it’s still hot.
  • 15 cm ruler, and a digital caliper from Harbor Freight
  • Duster, for sweeping dust and bits of plastic off the print bed.
  • The USB charger that the USB hub is plugged into. (The fan and strip light are both plugged into the hub.) The charger is the one that came with the fan.

Several of the things I’m making are meant to be stuck to a magnetic whiteboard, so I’ve got stuff for that:

  • Magnets, obviously. I have strong permanent magnets—strong enough that the protective packaging is more protecting everyone and everything outside the package than protecting the magnets. A millimeter of plastic and a layer of silicone is enough distance to water them down to fridge-magnet pull.
  • Super Glue, of the brush-on type.
  • Disposable gloves, for handling the glue (“WARNING: BONDS SKIN INSTANTLY”) safely.
  • GE “100% silicone”, for added grip. (I’ve had mixed success with this so far. I may need to lay it on thicker than I’ve been doing.)
  • Plastic putty knives for applying the silicone to the parts.
  • Metal putty knives for removing the silicone from the plastic putty knives.

Software I use

I use OpenSCAD to design models—programmers will love it—and Simplify3D to slice and export the model for the printer. (Simplify3D exports G-Code; for a printer like mine, you’ll need GPX to convert it to an x3g file.)

UPDATE 2016-09-09: The version of Simplify3D I have now successfully exports x3g files on its own.

OpenSCAD is different from most 3D modeling software: It’s text-based. You describe your model in code, mainly using shape primitives and set operations (intersection, difference, and union), and then hit render to see what it looks like. When you’re done iterating, you do a final (longer-running) render, then export STL.

Simplify3D is a $140 slicing and printer control program. It’s both the best one out currently and ugly in a lot of places (especially the installer, which is a Windows-style “setup wizard”). It offers you a lot of control, which is both a blessing and a curse—but it means I can do certain things that I want that MakerWare wouldn’t let me, like crank the printer’s base print speed up to 125 mm/s (the default is 90).

So I write a model in OpenSCAD, export it to STL, bring that STL file into Simplify3D, export G-Code, and use gpx to convert the G-Code to x3g. I then put that x3g file onto the SD card to put into the printer.

Software I’ve tried and abandoned, or not tried at all

I’ve tried Cheetah3D, 123D Design, and Inventor Fusion. I found them all limiting in various ways; I frequently run into “I know what I want but either don’t have a tool that does that or the tool doesn’t want to let me do that” situations. OpenSCAD is bare-bones, but expressive.

I have not tried the successor to Inventor Fusion (which requires an internet connection, which makes no fucking sense for 3D modeling software), nor have I tried Blender.

I originally used MakerWare, and it was OK, but I find it hard to give up some of S3D’s more advanced features, like the speed control. I did have to export one part from MakerWare because Simplify3D seemed not to notice a long, very thin cylinder that was part of the model—but that’s the only problem I’ve had with S3D so far.

I’ll likely go back to MakerWare, at least initially, when I do my first dual-material (PLA+PVA) print. Simplify3D’s UI does not give me lots of confidence that it will handle that correctly without my needing to explain it some things.

I have tried Slic3r. Here’s a picture of me using it:

I have no idea what I'm doing.

I haven’t tried the newer “MakerBot Desktop” (successor to MakerWare), nor ReplicatorG, nor any of the other, older slicers.

I really want someone to come out with the iWork of slicers. Or modelers, but I’m happy enough with OpenSCAD that I’m likely not to want to put in the time to learn another GUI modeler, unless it’s a graphical editor for OpenSCAD files. But a truly nice slicer, with Simplify3D’s capabilities but much more refined and easy-to-use UI, would be great.

More on the absurdly small size of storage

Thursday, February 3rd, 2011

According to Wikipedia, a drop of water can be up to 6 mm in diameter. That works out to 0.1131 ml.

The volume of a microSD card is 0.165 ml.

The largest size of microSDHC card is 32 GB.

This means that just over 21.9 GB of data will fit in the space of a drop of water.

My new movie-watching mode

Wednesday, March 31st, 2010

The DVD drives in the last few years’ Mac models are quite loud. When watching a movie from a DVD, it sounds like I have a very-high-speed fan only a few feet from me, only without the cool breeze.

This is a problem because I keep my sound volume cranked way down (to the benefit of my hearing), so the DVD drive effectively drowns out the movie. I don’t have this problem when watching a video from a hard drive or the internet.

So here’s what I do:

  1. Copy (straight across—no decrypting) the DVD to my media hard drive on my desktop machine.
  2. Eject the DVD, put it back in the case, and put the encased DVD away.
  3. Watch the movie in VLC.

Yesterday, I successfully tried a new variation on this procedure:

  1. Copy the DVD to my media drive on my desktop machine.
  2. Eject the DVD and put it away.
  3. Make the Movies folder on the media drive a shared folder.
  4. With the desktop machine downloading stuff from the internet or maybe seeding a (legal) torrent, go on my laptop in another room and mount the desktop’s Movies folder on the laptop.
  5. Watch the movie (in the mounted shared Movies folder) in VLC.

You’ll notice that I did not copy the movie to the laptop. I opened the copy on the mounted local share, so VLC on my laptop was effectively streaming the movie from my desktop.

This requires a bit of tweaking in VLC’s Advanced Preferences. The default settings waited too long to read more data from the “disk”, so the movie was jerky. I fixed this by appending a couple of zeroes to the latency fields for the three relevant “access modules”: DVD without menus, DVD with menus, and file. (You may only need to set the last one; it didn’t work right until I set that one, and once it did, I didn’t do any further investigation.)

Once I’d made those small changes, the movie streamed fine over the local network.

My Amadeus Pro sonogram preset

Monday, March 15th, 2010

When I do audio editing in Amadeus Pro, I find its Sonogram command useful. That command gives me a three-dimensional graph of frequency distribution through time:

Where x = time, y = frequency, and z = amplitude.

The default setting shows the z axis with a color gradient of white through orange through blue to cyan, which I found hard to read. What you see above is my variation on the built-in “Greyscales” preset: Just like a printout, white is dead, black is maxed.

The difference with my preset is that the original is linear, whereas mine is a curve. Here’s the preset editor, showing my preset:

The “Grayscale Nonlinear” preset.

Sampling the swatches in that screenshot will tell you that the five equally-spaced gradient stops are:

  1. White
  2. 50% gray
  3. 25% gray (at the halfway point)
  4. 12.5% gray
  5. Black

I’ve found that these settings make the spectrogram clearly readable without my having to fiddle with the “range” and “gain” sliders.

The focus switch on the Kodak Zi6

Wednesday, December 23rd, 2009

The Kodak Zi6 pocket video camera has a switch on its upper-right corner that selects its focal length. It appears to have two settings: Distance, indicated by mountains, and macro, indicated by a flower.

That appearance is wrong. The switch is not binary; it actually selects within a range.

This is useful for things that are close to the camera, but not macro close. For an example, I took pictures of my keyboard. Fully macro was unusably blurry; fully distance looked like this:

Slightly blurry.

whereas moving the switch a little bit up from distance mode got me this:

Perfectly clear.

Neither photo has been adjusted at all. Both photos were taken freehand, but I can vouch for their sharpness-accuracy: What you see in the first photo is focal blur, not motion blur.

So, if you have a Kodak Zi6 (or, perhaps, one of their other cameras, especially in the same family) and you want to take a photo or video of something close but not macro close, adjust that focus switch a little bit.

Andy Richter Controls the Jeopardy! Board

Thursday, September 17th, 2009

Every once in awhile, Jeopardy! does a special series of episodes called Celebrity Jeopardy!, where the contestants are celebrities playing for charity. Most of them are laughably bad, and I mean that literally: I (and the studio audience, and the contestants themselves) actually laugh at their poor responses. The celebrities are mainly there to provide entertainment, and to bring attention to their charities and their own projects and to Jeopardy! itself; playing a few rounds of Jeopardy! is a formality.

The problem is simple: Regular Jeopardy! games are populated by contestants who pass one or more screening tests that verify that they meet some minimum standard of knowledge, comprehension of English, and ability to operate the buzzer. Celebrity Jeopardy!, on the other hand, is populated by celebrities. They have no qualifications other than being famous and being willing to be on the show to benefit a charity.

This year, they’re doing a variation of Celebrity Jeopardy! called the “Jeopardy! Million-Dollar Celebrity Invitational”, where they have one Celebrity Jeopardy! episode every month for nine months, followed by a three-day semifinal and two-day final in the tenth month. The other episodes in each month are at least mostly regular episodes, perhaps with a Tournament of Champions, Kids’ Tournament, or College Championship at some point.

Tonight was the first episode in this celebrity tournament. The contestants were Andy Richter (for St. Jude Children’s Research Hospital), Dana Delany (for the Scleroderma Research Foundation), and Wolf Blitzer (for the American Cancer Society). Richter’s performance tonight inspired this post.

Andy Richter decimated his opponents. Dana Delany did pretty averagely, entering Final Jeopardy! with $2800; Wolf Blitzer ended up well negative (they gave him $1000 with which to play in Final anyway, since this was a charity event). Richter got most of the answers, and he almost always gave right questions. He even ran a category.

This tournament, every celebrity’s charity is guaranteed a minimum $25,000 donation, and each winning celebrity’s charity is guaranteed a minimum $50,000.

Andy Richter won $68,000.

It makes me think that most celebrity contestants just show up, figuring that it’s $25k their charity wouldn’t have otherwise, and all they have to do is stand there for an hour or so and throw out an occasional right answer—something regular contestants can’t do, because they have to earn their spot behind a podium. And it makes me think that Andy Richter didn’t do this: He took this tournament seriously, and put in the exact same study and buzzer training that any regular contestant would have done.

I could be wrong. Maybe the other two contestants just got screwed on the buzzer (although that wouldn’t explain Wolf Blitzer’s score). But if I’m right, Richter’s charity should be really happy with the work he put into it.

I have one idea for how Sony (the company that runs Jeopardy! in the US nowadays) could improve things. Tell every celebrity who agrees to play that they will have to take the same screening test as a regular contestant would have to. If they fail, no problem: They still get to play. But if they pass, Sony doubles its minimum donation guarantees for their charity. That may be enough of an incentive for celebrities to take it as seriously as Richter seems to have done, and bring a real game to the Jeopardy! set like he did.

You might object that I shouldn’t complain about these celebrities who are playing for charity; after all, isn’t it great that the charities get all these thousands of dollars for free? True, but the celebrities can win even more money for them, and I think Richter demonstrated that it’s much more entertaining when they do.

On a related note: I wish Jeopardy! episodes were available online.

UPDATE 2009-09-19: YouTube to the rescue: Part 1, part 2. Thanks to Ian Baird for linking to one of them.

Popularization

Monday, May 11th, 2009

Here’s something I found interesting.

If you’re on Twitter, you might have noticed a trending tag today, #TMItweets. People have been deliberately posting tweets with Too Much Information, tagged with #TMItweets.

The interesting part is who started it.

If you go all the way back on the Twitter search for the tag, you’ll find that the earliest tweet in the search engine’s short memory is this one from Alex Fayle, 20 days ago. I don’t think he’s who started the current trend.

The next few tweets are. They are, in order:

  1. Tai (her tweet)
  2. Dora Bianchi (her tweet)
  3. Hannelore Ellicott-Chatham (her tweet)
  4. Raven Pritchard (her tweet)
  5. Pintsize* (his tweet)
  6. Penelope Gaines (her first tweet with the tag; her second)
  7. Faye Whitaker (her tweet)

If you read Questionable Content, you recognize those names. These are the official QC character accounts, they each have thousands of followers, and they’re all written by Jeph Jacques.

So, basically, this trend started among a closed circle of fictional characters, and migrated into the real world from there within minutes**. I can’t think of a medium where this could have happened before (without including it in the primary medium—in this case, in the comic strip).

Like I said, I found it interesting.


* Not linking directly to Pintsize’s account page because the links he posts are almost all NSFW. Consider yourself warned.

** Pintsize posted his #TMItweets entry at 5:05:46 UTC, and the first subsequent non-QC entry came at 5:07:53 UTC. I used the Twitter API show-status method through curl to obtain these timestamps.

Scale

Wednesday, April 29th, 2009

264 doesn’t sound much bigger than 232, does it?

264 is 232 × 232, but this relation is hard to put into perspective. Even saying that 264 is more than four billion times as big as 232 doesn’t adequately convey how much larger it really is.

Let me do that for you now.

I wrote a program that counts from 0 to 232. It takes about 11 seconds to run:

% ./count-up
2009-04-29 09:52:55.387 count-up[57932:10b] Time to count up to 4294967295: 11.313282

Now, as I said, 264 is 232 × 232, so the time to count to 264 is likewise the time to count to 232 (11.313282 seconds) multiplied by 232. That works out to:

  • About 48,590,176,200 seconds
  • About 13,497,271 hours
  • About 562,386 days
  • About 1540 years

Simply by doubling the exponent, we increase the time it would take my late-2006 four-core Mac Pro to count up to the number from 11 seconds to a millenium and a half.